Juji API
The Juji Cognitive AI infrastructure consists of two core cognitive AI engines: Psychographic Insights Engine and Cognitive AI Chat Engine. Both of are domain and industry independent. Developers can access both Juji engines via API and build their own cognitive AI applications in any domain and industry.
Juji Psychographic Insights API
The Juji Psychographic Insights API enables developers to access the Juji Psychographic Insights engine and use it to analyze any text generated by a person, such as social media posts, blogs, emails, voice transcripts, and chat text, and automatically infer this person's quantitative human trait scores. Currently, Juji infers the scores of 100+ human trait models, including fundamental human personality models (e.g., Big 5 traits) and composite psychographic models (e.g., Holland Codes).
Juji psychographic inference engine enables the discovery of diverse human innate psychographic characteristics from text originated in any applications, domains or industries. Moreover, Juji-inferred human characteristics are typically persisted over a long period of time and are shown to be effective at predicting human real-world behavior.
Given the power of psycholographics and its wide applicability to virtually any domain and industry, developers can use the Juji Psychographic Insights API to build a wide range of AI applications across domains or industries. These AI applications can automatically derive user psychographic insights and use the discovered insights to predict or guide user behavior, including
-
financial applications that auto-assess borrowers' personality traits and recommend suitable financial products;
-
educational applications that auto-discover students' psychologic needs and learning style to match-make students with learning programs and mentors;
-
talent management applications that auto-assess the soft skills and moral characters of police candidates to determine their fit for a police job role; and
-
healthcare applications that auto-infer patients' personality traits and deliver hyper-personalized treatments.
Juji Cognitive AI Chat API
While the Juji Psychographic Insights engine can be used alone, it is best used in an end-to-end AI application to maximize the power of psychographics. Typically, such an application auto-gathers high-quality user data for psychographic inference and then uses the inferred psychographic insights to predict and guide user behavior and aid human decision making.
One class of killer applications for best harnessing the power of psychographics is cognitive AI assistants that can automate high-touch, human-AI engagements via two-way conversations. However, creating cognitive AI assistants from scratch is nontrivial, requiring Psychology, AI and IT expertise, as well as extensive computational and data resources.
Juji Cognitive AI Chat API enables developers to access the Juji Cognitive AI Chat engine and rapidly build an end-to-end cognitive AI assistant in a form of chatbot in any domain or industry. Developers can also use the API to deploy their chatbot in multiple forms, includng in a text chat window on a website, a third-party mobile application, or an embodied AI agent.
For example, developers can use the Juji Cognitive Chat API to rapidly create an AI chatbot in the healthcare wellness domain, which will gather memeber data naturally in a conversation and feeds the data to the Juji Psychographic API for analysis. The AI chatbot can then use the inferred psychographics to deliver hyper-personalized wellness guidance in the same conversation.
Authentication
Most Juji API endpoints requires authentication. Two types of authentication are supported.
JSON Web Token (JWT) Authentication
This authentication is based on JWT (https://en.wikipedia.org/wiki/JSON_Web_Token).
Once you have created an account at https://juji.ai/signup, to authenticate to the API, supply your email and password to the authenticate GraphQL mutation and request the token field in the response, e.g.
mutation
  authenticate($input: AuthenticateInput!) {
    authenticate(input: $input) {
      token
    }
  }
email and password fields.
If successful, a JSON object is returned with a token, e.g.
{
  data: {
    authenticate: {
      token: "a very long random looking string"
    }
  }
}
For all subsequent API calls, add the returned token in the Authorization header of the request with the string Bearer prefixed to the token. For example, if the returned token was abc then the Authorization header would be Bearer abc.
Note that all API calls must be made over HTTPS and that as of now, the returned token is valid for up to 10 hours.
API KEY Authentication
API key can be used as a long lasting token for autentication. Once you obtained the key, you can used it for years. So it is useful if you want to build some integration with Juji on your product.
To obtain the API key, you will need to do the following:
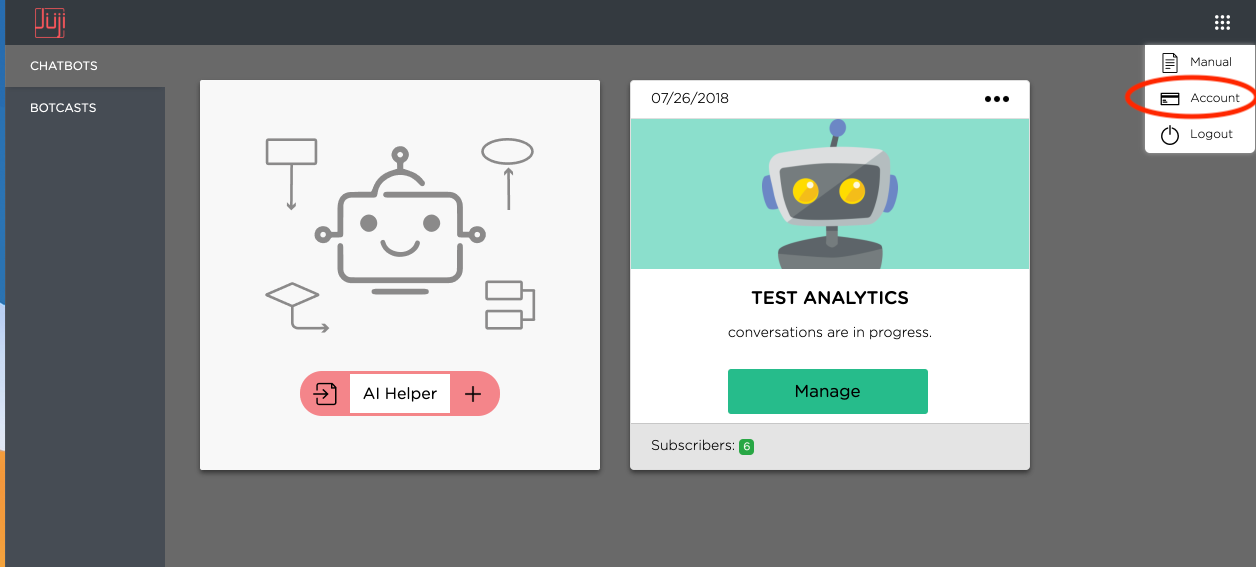
- Log in to your Juji account on juji.io
-
In the dashboard, click the top right button and select Account
-
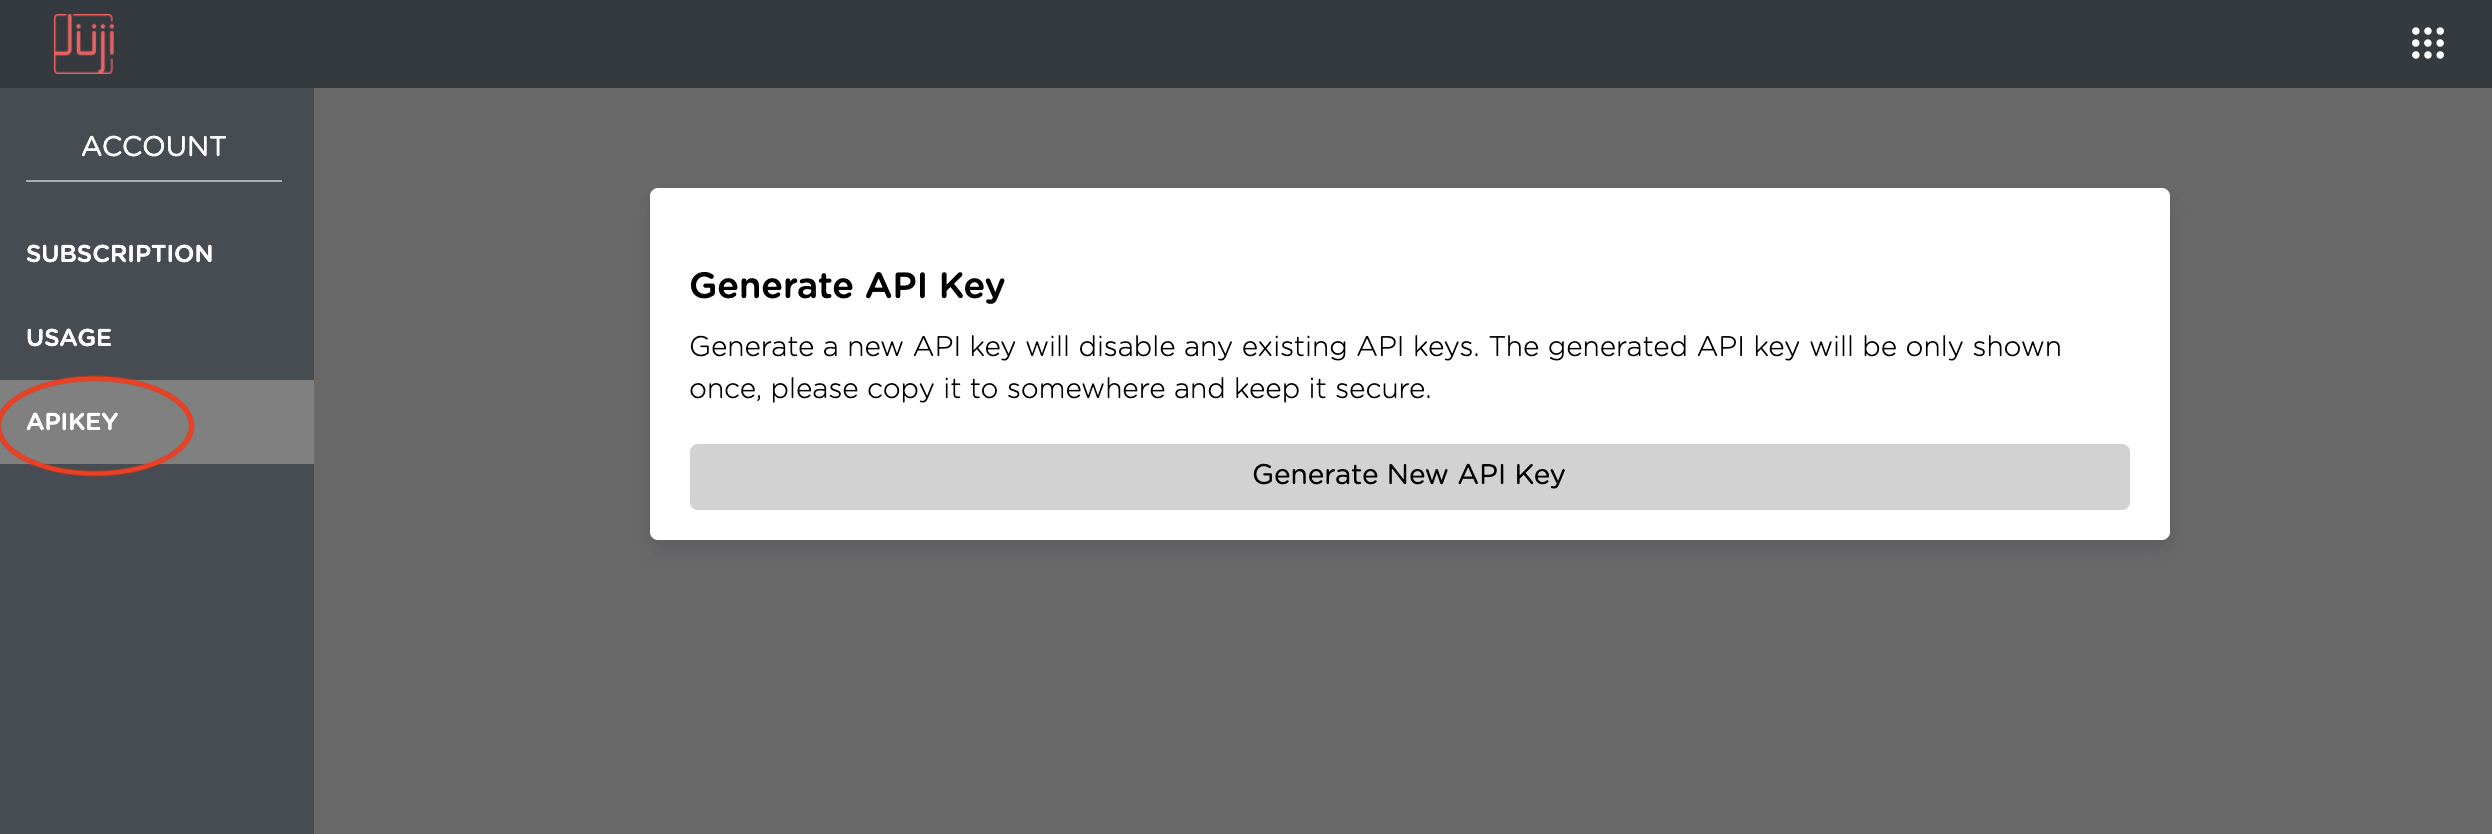
In the Account page, select "APIKEY" then select "Generate New API Key" to get one
-
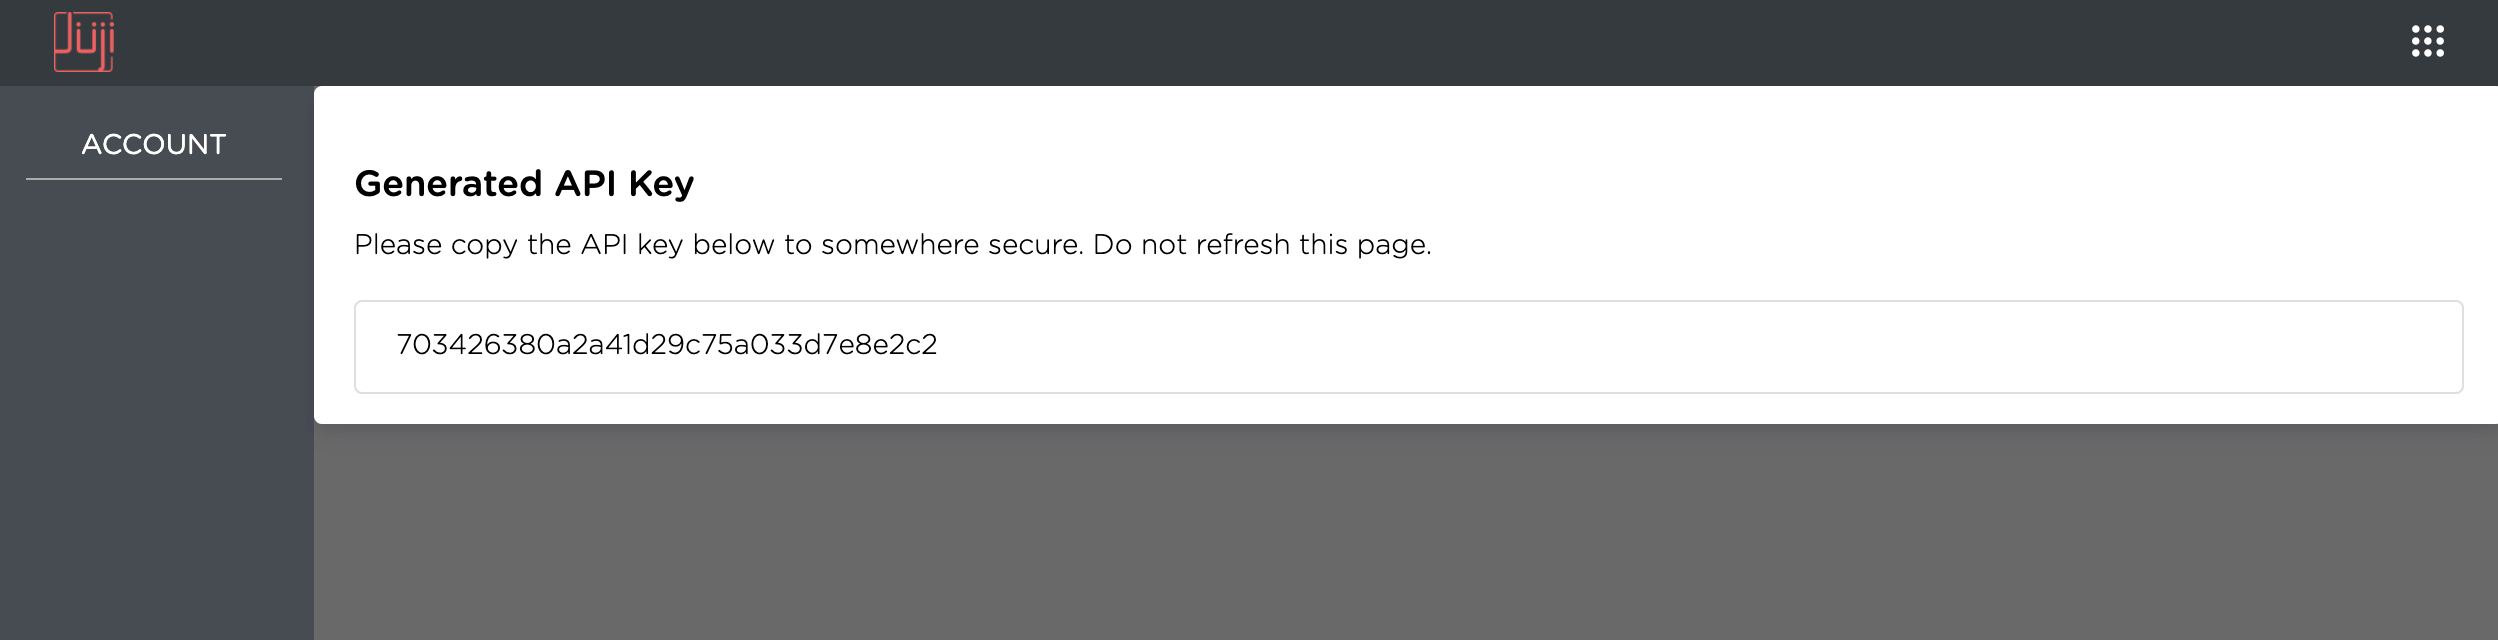
Copy the generated API key somewhere secure and don't tell anyone :) Note that you will only see the API key on Juji website once. If you lost it, you will need to generate a new one.
Once you have the API key, you can use the basic auth method to authenticate your API calls. Use "apikey" as the username and your API key as the password. Below is an example in Postman:

In cURL you can use -u or --header:
-u 'apikey:cd177690b1e3484b8c3d3e0e27bce4a2'

--header 'Authorization: Basic YXBpa2V5OmNkMTc3NjkwYjFlMzQ4NGI4YzNkM2UwZTI3YmNlNGEy'
Domain Nouns
To effectively leverage Juji API, it is useful to understand the data schema of Juji platform. Juji data is organized with the following domain nouns.
Brand
A brand is synonymous to an organization.
Engagement
An engagement is a chatbot project created under a brand.
REP
REP is abbreviation for Responsible Empathetic Persona. It is the identity of a chatbot, with a name and a personality. Each engagement has a REP.
Release
A release represents a versioned deployment of one engagement. Thus an engagement may have multiple releases. This allows you to refine your bot without impacting your production release.
Script
Each release is associated with a corresponding script in REP Language. The script is identified by a unique namespace. The namespace has a format <brand-name>.<engX>.<rep-name>, where X is the sequence number of the engagement, e.g. mycorp.eng3.kaya
Question
REP often asks questions in a chat. Each question is associated with the namespace in which it resides, as well as a question id that is unique in that namespace.
Participation
A participation represents one instance of a conversation by an end user with a REP. A participation is always associated with a release.
Answer
Each end users answer to REP's question is recorded, along with the participation in which the question is answered.
Access Other Juji Components
- Juji Studio (https://juji.io/docs/juji-studio/)
- Juji IDE (https://juji.io/docs/juji-ide/)