Customize Main Chat Flow

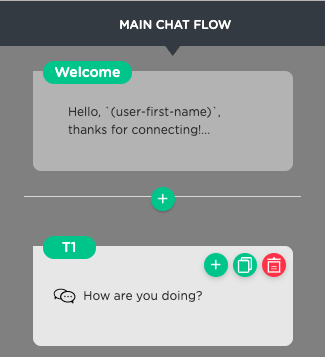
As shown above, an AI chatbot created based on a template already contains a default chat flow, which consists of one or more topic blocks shown on the left side of the screen. Each topic block often represents a Juji built-in mini dialog that enables a chatbot to automatically carry on a multi-turn conversation with users.
A chat flow is often defined for a chatbot to achieve specific goals. For example, a typical AI sales helper chatbot is associated with a chat flow that asks a user several questions and then use the gathered information to offer personalized services, such as making product recommendations.
Since each chatbot is made for its own missions, you can easily customize a chatbot by altering the chat flow or any topic blocks in the flow.
Add a Topic
One can add a topic to an existing chat flow in one of the two ways:
-
Click on the round green
+button below theWelcomecard to add a topic at the beginning of a chat flow. You can also use the same green+button above theWrap-upcard to add a topic at the end of a chat flow. -
Mouse hover any topic card (e.g.,
How are you doing?) and then select the round green+button to add a topic after the current topic card.
As shown above, Juji currently supports two types of topics:
Chatbot Request
This is for a chatbot to ask a user a question or perform a certain action. The chatbot must wait for a user to respond to such a request before moving the conversation forward. Currently, Juji supports several types of chatbot request as described below.
Chatbot Message
This is for a chatbot to send a message to a user without waiting for a user's response. Currently, Juji supports several types of chatbot messages as explained below in detail.
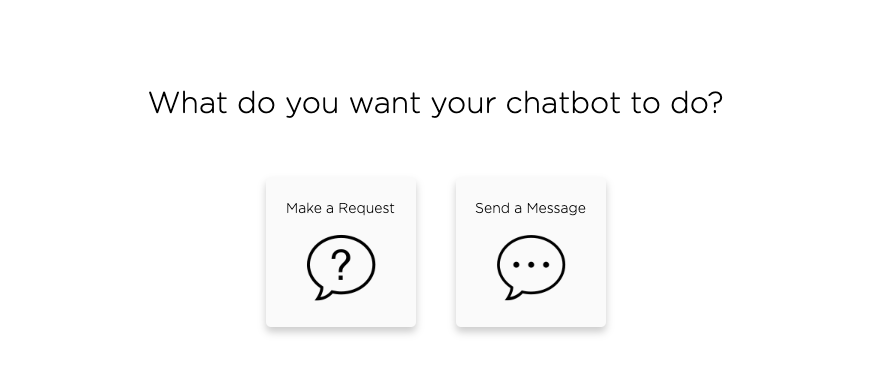
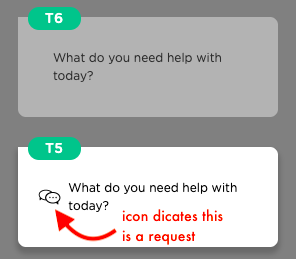
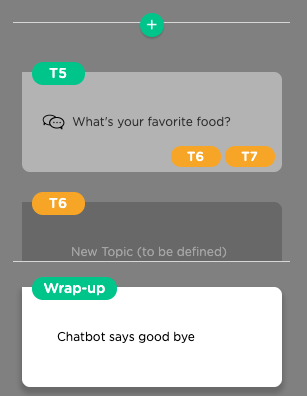
IMPORTANT TIP If you intend to have your chatbot wait for a user input before moving on, make sure you choose Make a Request. Otherwise, your chatbot simply ignores any user input even if the message is worded like a question. As the example shown below, T6 will not wait for a user's input but T5 will. Note the chat icon appearing on T5, indicating T5 is a "true" question.
IMPORTANT TIP
To decide which chatbot request to use, please check out this design tip.
Edit a Topic
No matter whether you wish to configure your chatbot to make a request (aka asking users a question) or send a message, once a topic is added, you can then edit the topic in four sections:
-
Chatbot Content. This is to customize a message that a chatbot will send to your users.
-
Chatbot Responses (only for request topics). This is to customize a chatbot's response to a user's reply to a question asked by the chatbot.
-
Chatbot Actions. This is to customize a chatbot's actions prior to or after the chatbot send users a message (e.g., posing a question or displaying an image).
-
Topic Settings. This is to customize various settings related to a request or a simple message.
Chatbot Content
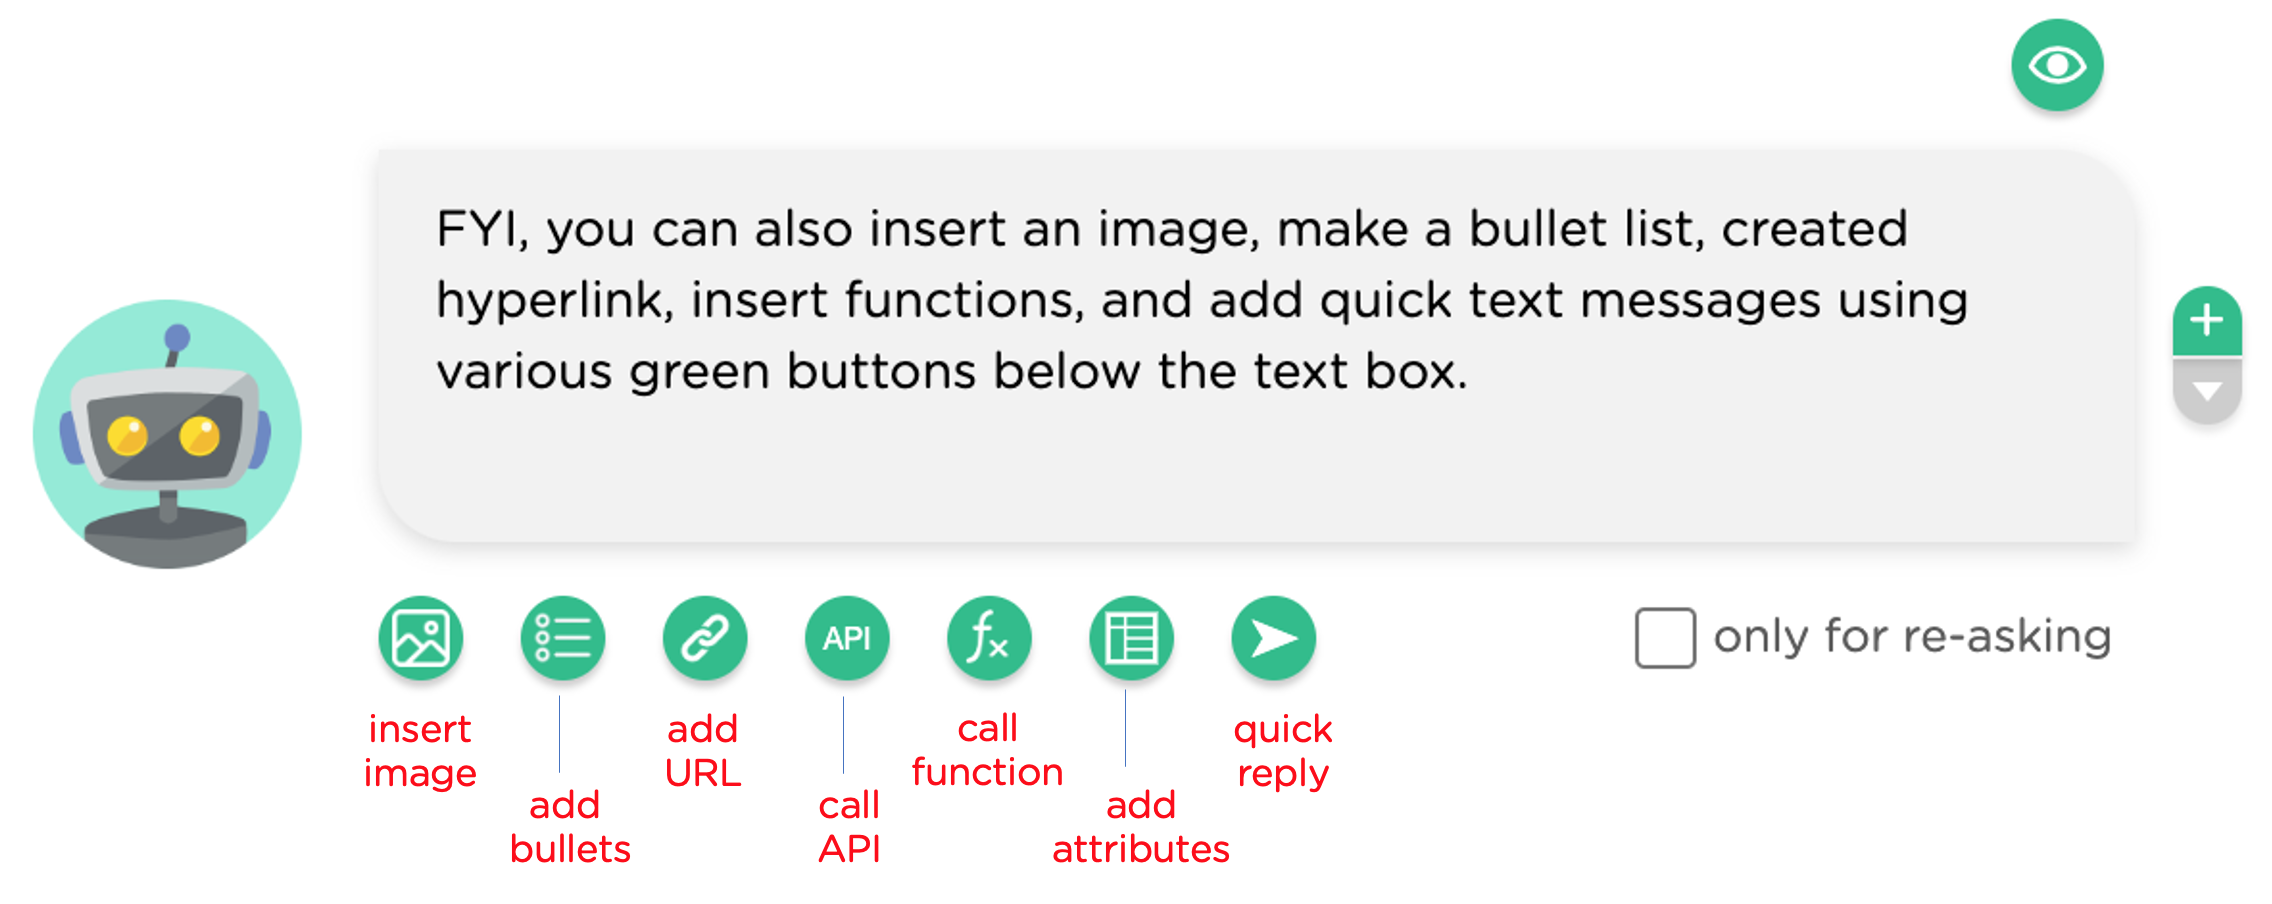
You can customize a chatbot's message(s) to users during a chat. Please refer to design best practices for composing the content of such a message. Below lists various message editing options.
Below we use a set of examples to show how to use each of the editing options and how the content would appear in a chat on the web or Facebook Messenger.
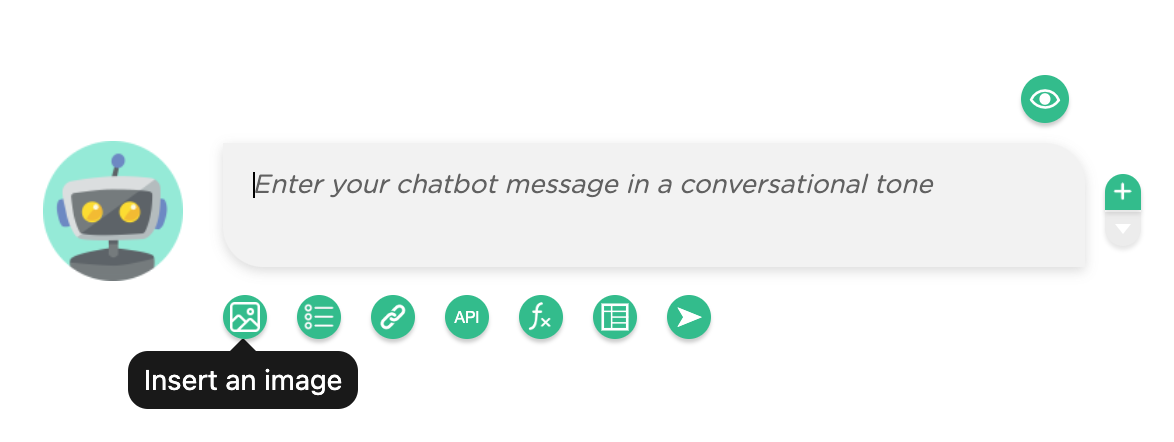
- Add an image Click on the "add an image" icon to insert an image into a chat message. This allows an image to be uploaded and displayed in a chat.
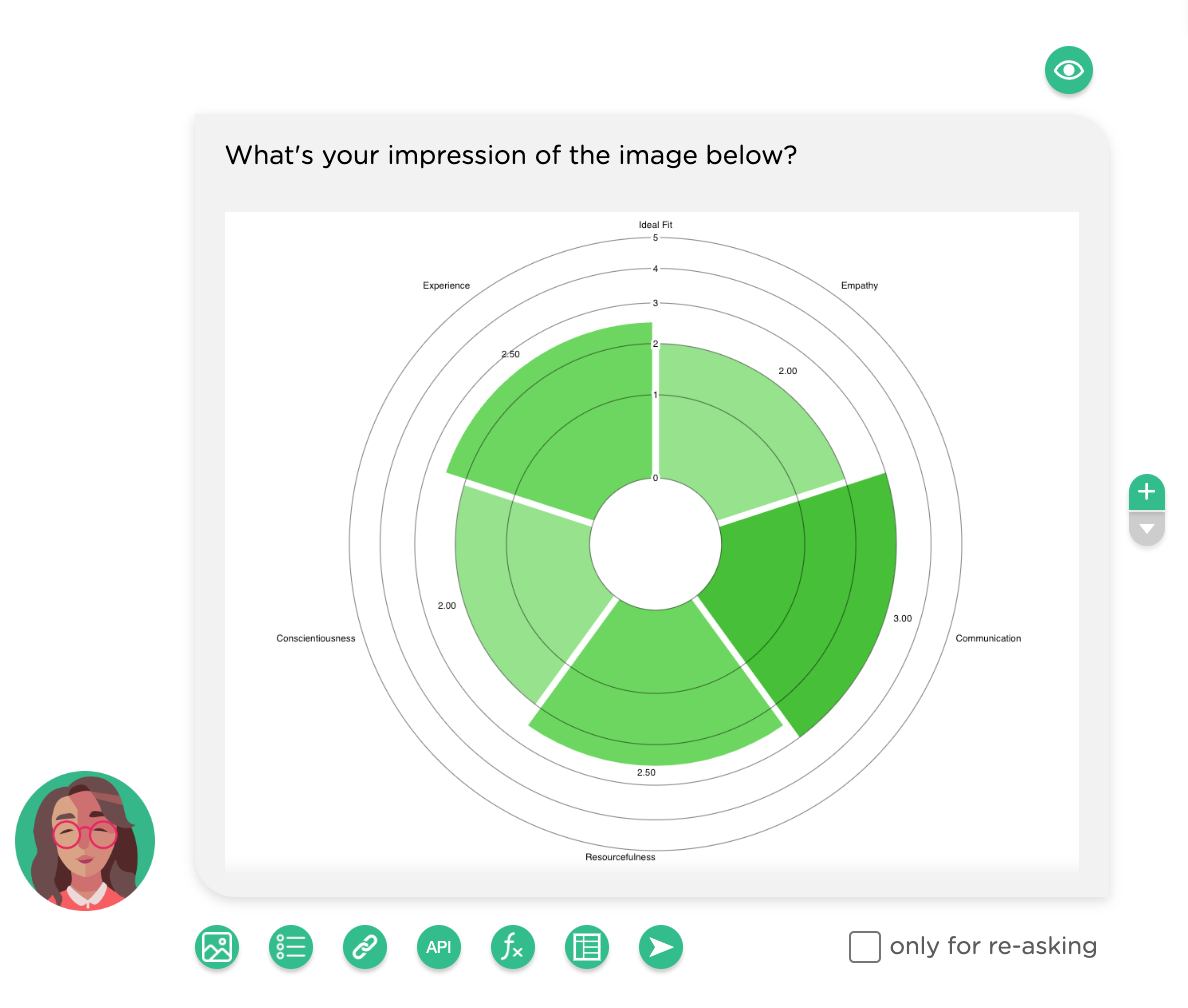
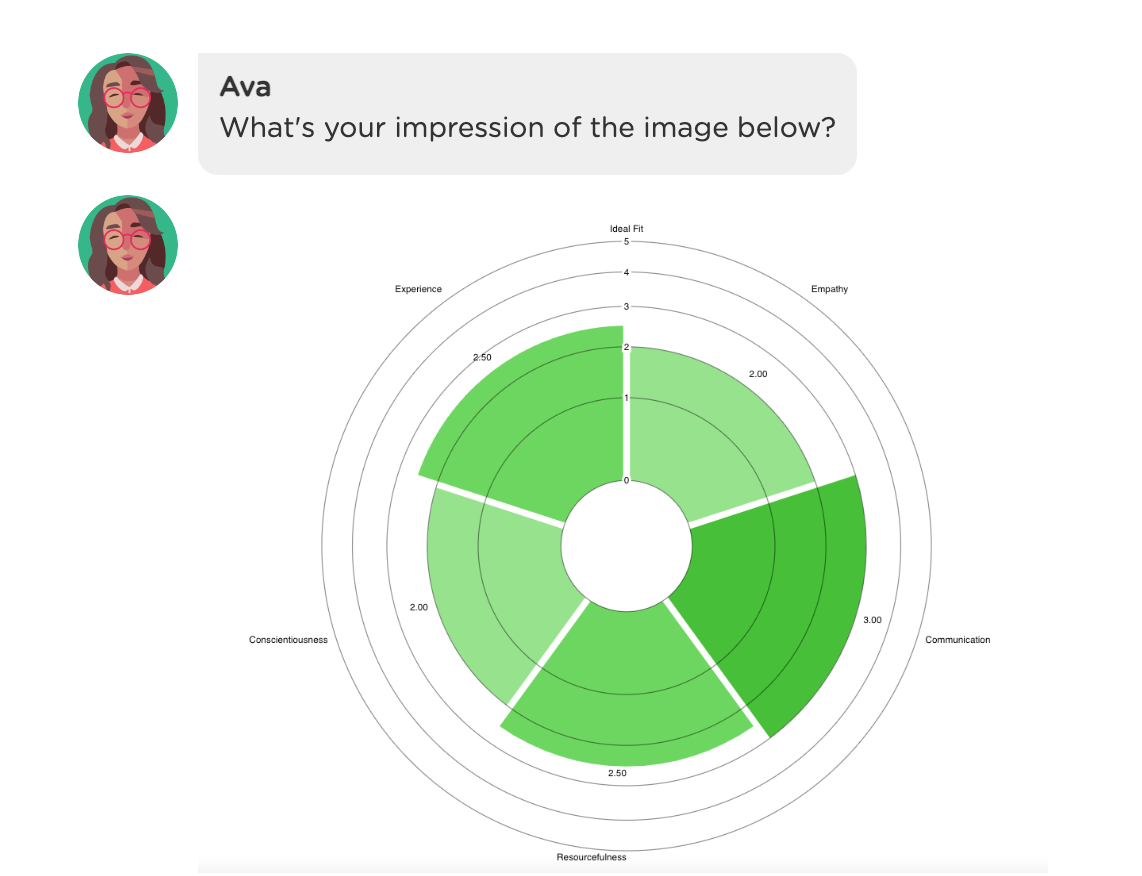
The screenshot below shows how an image is displayed in a chat. It is displayed right before or after a text message.
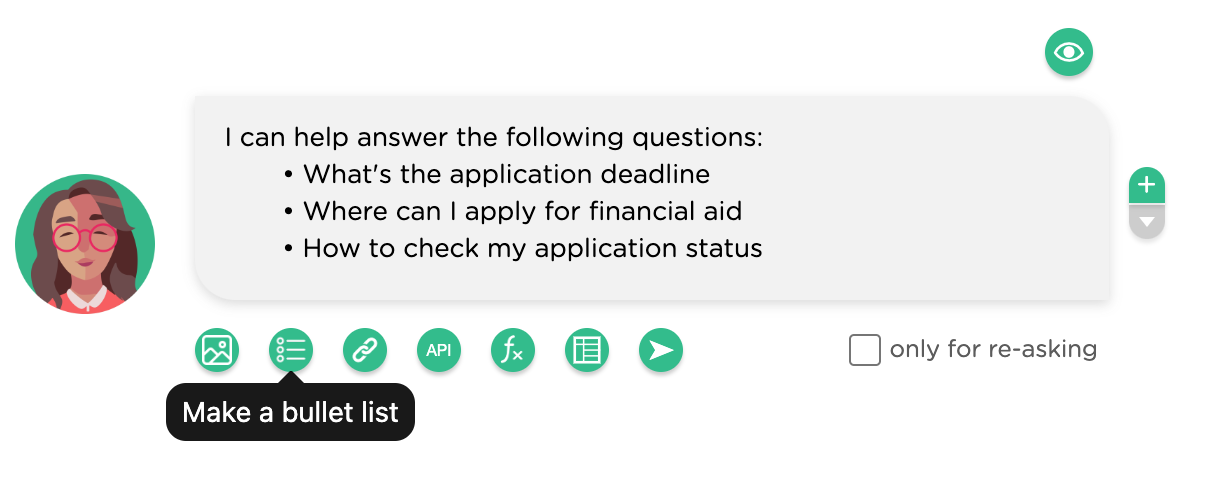
- Make a bullet list Select part of the message text and then click on the button "Make a bullet list" to convert the highlighted text into a bullet list as shown below.
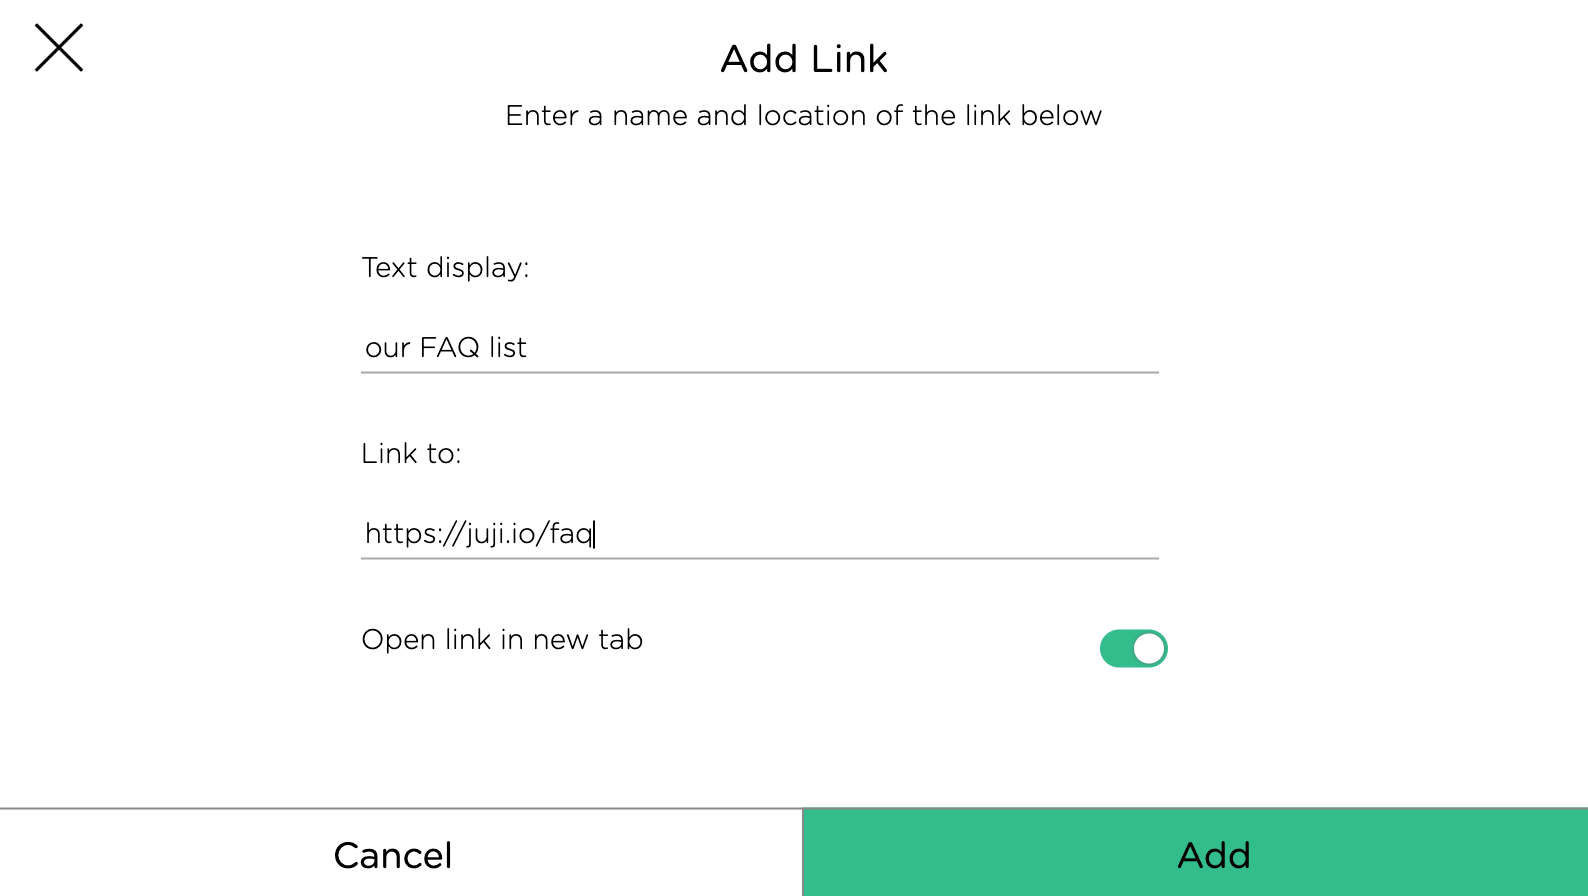
- Insert a hyperlink A chatbot can send a message with a URL link so users can follow the link to access more information. Select part of the text message (
FAQ list) and then click on theCreate a hyperlink of highlighted textbutton to add a URL.

During a chat, the content of the hyperlink can be accessed in one of the two ways: in a separate browser tab or within the same window where the chatbot sits. When you insert a hyperlink, you can select which option you'd prefer.
The clickthroughs of any inserted hyperlinks are tracked automatically. This means that a chatbot owner can view which hyperlinks are clicked on and how frequently, which provides the indication what content your users might be interested. See "Reports" dashboard to view the clickthroughs of hyperlinks.
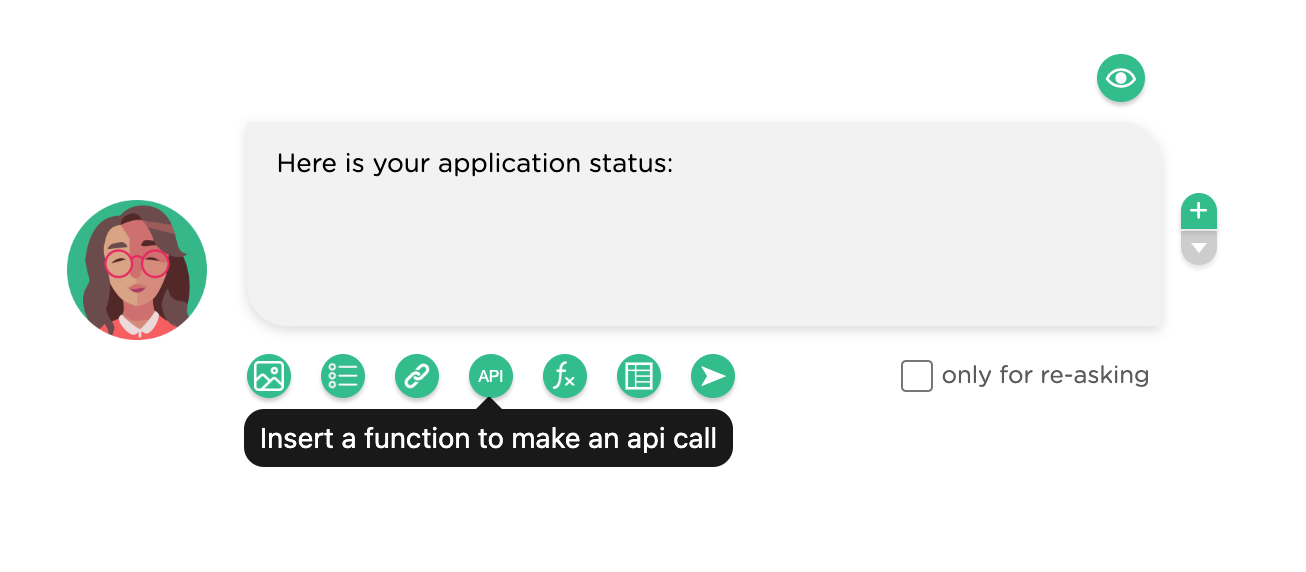
- Call an API A chatbot may need to access information stored in a third-party system (e.g., a CMS or CRM) in order to communicate information tailored to aspecific user. For example, if a prospective student asks about his/her application status, the chatbot needs to access Salesforce database to retrieve the requested information. To do so, you can insert an API call to access the third-party information. Specifically, just click on the "call API" button and then follow the API call pop-up to insert the API call details.
Your IT personnel often knows which API is supported and the syntax of such API calls. You don't need to write any code, you just need to get the API call details from them and copy & paste them into the API pop-up window. Here is a Youtube Video Tutorial on how to use APIs to connect your chatbot with other systems.
- Add a function Use the "Insert a function" button (
fx) to add a function, such as(user-first-name)to personalize the chatbot message or make a dynamic message (e.g., based on a user's input). Watch this Youtube video tutorial on how to use various functions including external functions to customize a chatbot message.

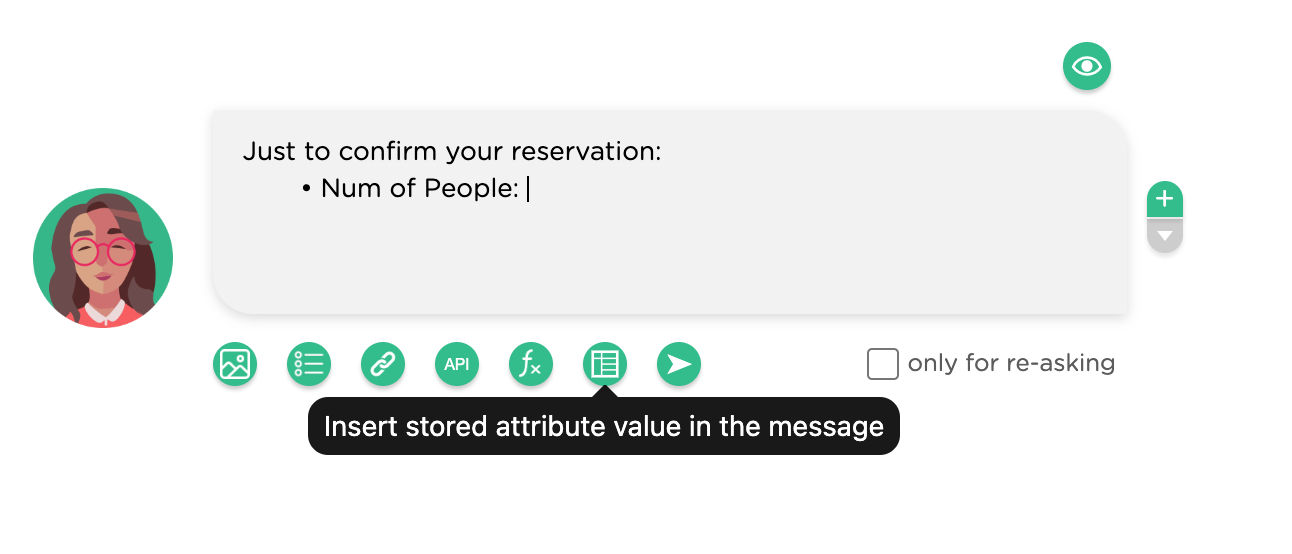
- Insert an attribute During a chat, a chatbot may gather bits and pieces of information from a user (e.g., the number of people, date and time info) in order to perform a certain task (e.g., making a reservation). As a good paractice, it is always desirable to repeat and confirm such information back to the user. To do so, you can insert an attribute in a chatbot message since user opt-in information is auto-captured in an attribute during a chat.
As shown the example below, click on the "Add attribute" button insert attributes that capture user input regarding a reservation.
Attributes are very powerful elements that can be used in chatbot design and help a chatbot learn new knowledge, maintain a memory, and accomplish complex tasks. Watch this Youtube Video Tutorial to see how attributes can be used in creating a powerful AI chatbot.
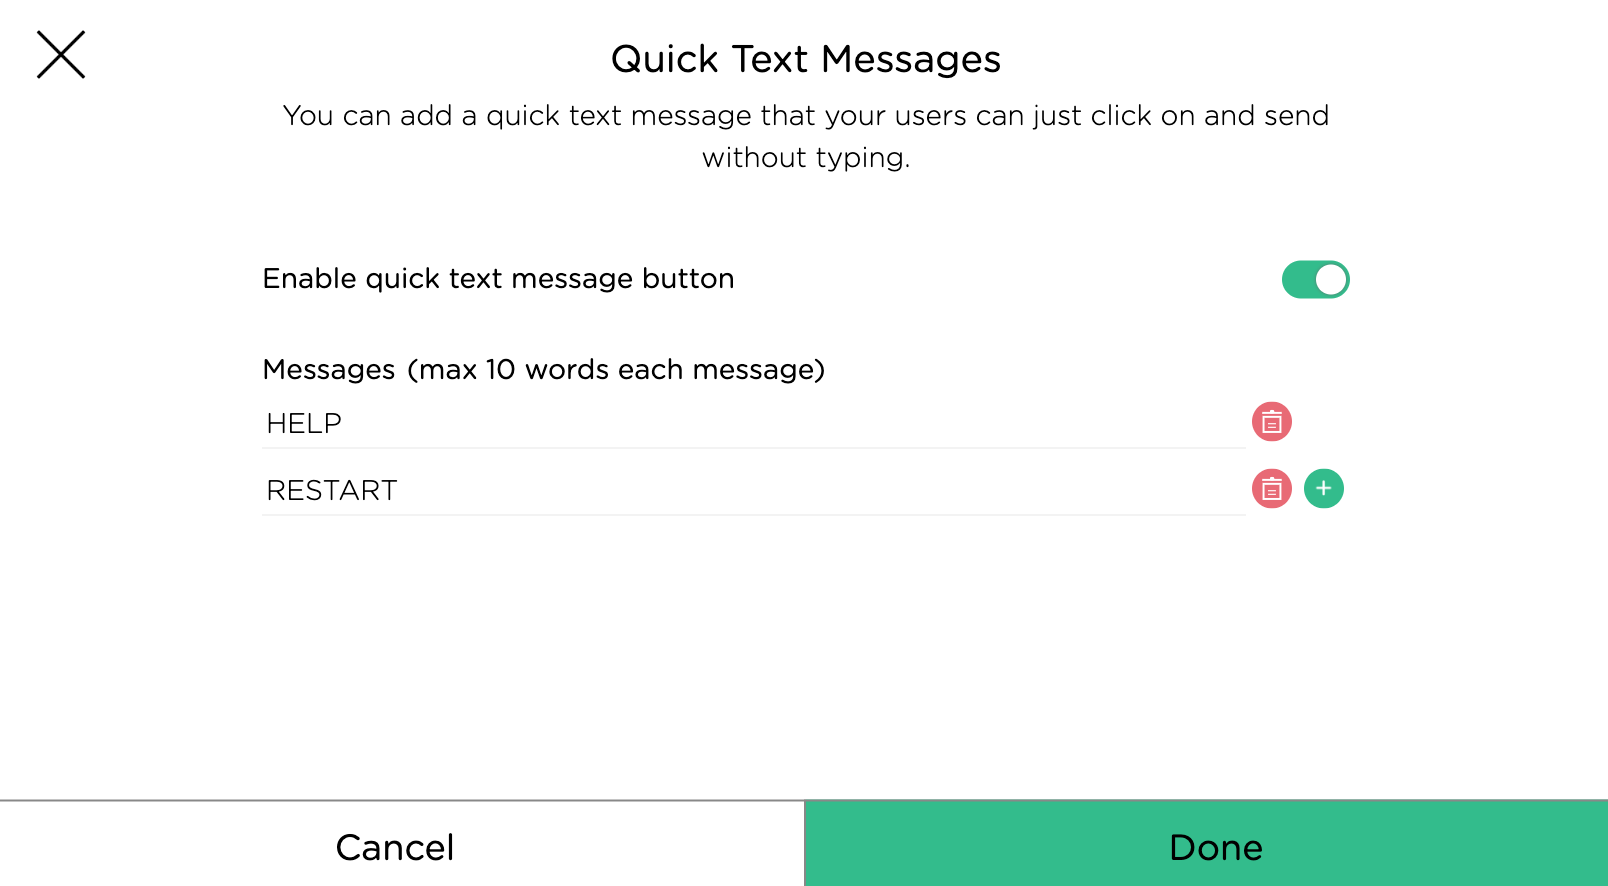
- Add quick texting messages In certain parts of conversation, you may want to provide users with a "quick texting" convenience. This means, when a chatbot asks a question, it also provides a couple of quick reply options, which a user can just click on the text to reply vs. type the text and then submit. This convenient reply mode is useful especially on a mobile device. The main difference between "quick texting" and radio buttons is that "quick texting" still allows users to provide other forms of responses while radio buttons take only button clicks. It provides the interaction convenience while remaining open to diverse user responses. We recommend that quick texting be used sparsely because a good conversation should not be dominated by "click to text".
Click on the button "Add quick text message" to add up to 3 quick messages.
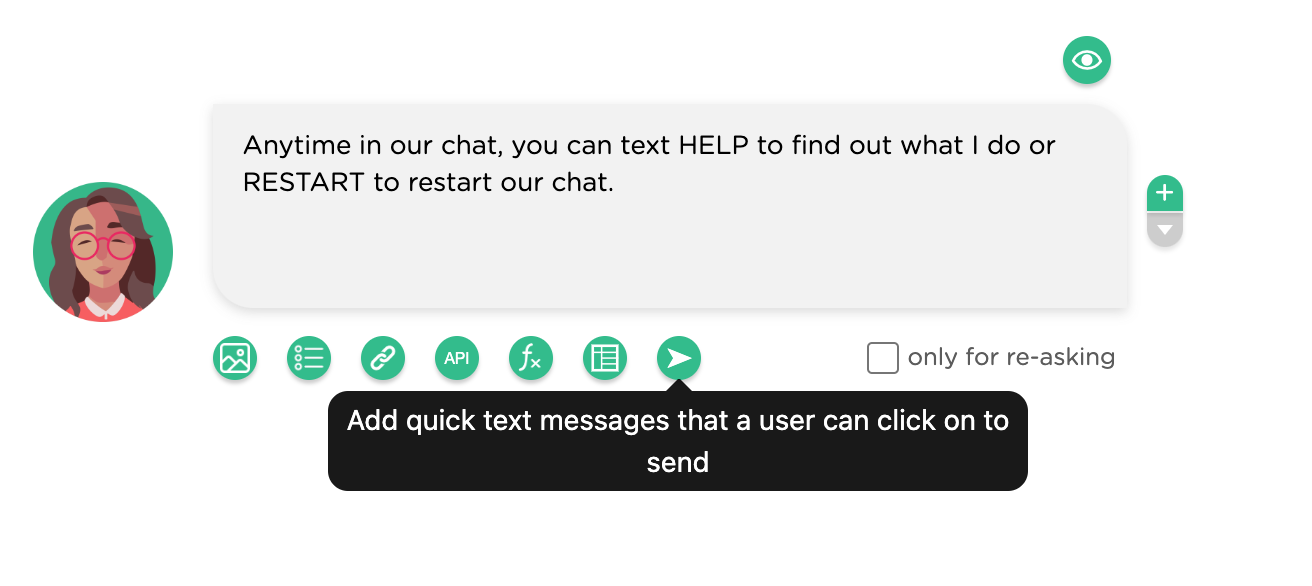
Here is how "click to text" messages look like in a chat:

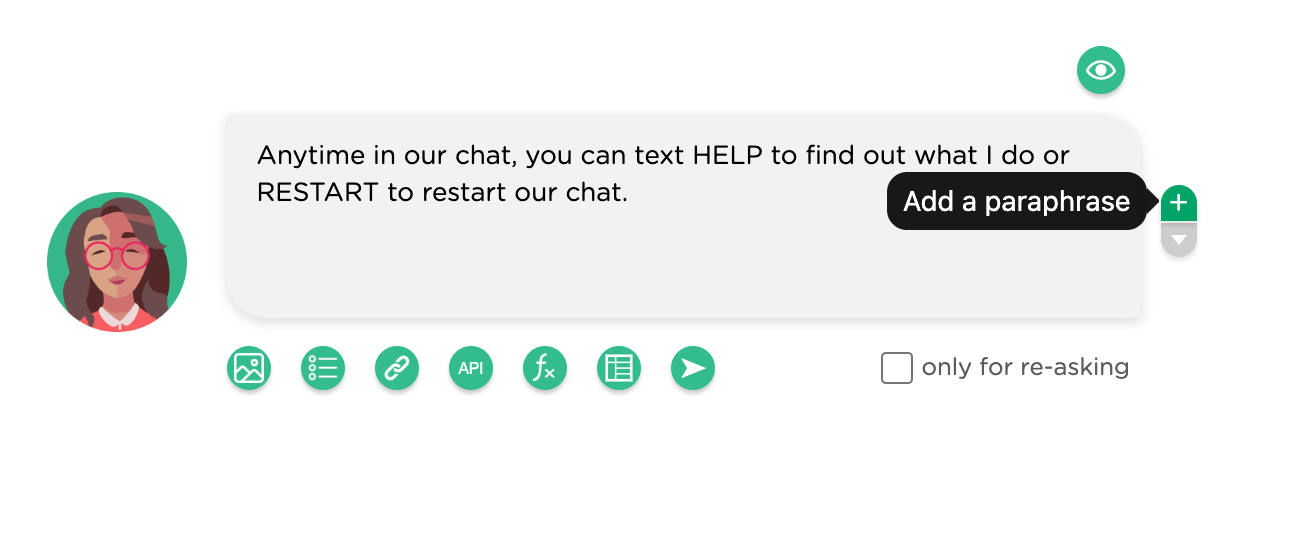
- Add a paraphrase To create a natural and rich conversation, you can also add paraphrases of a chatbot message, especially if such a message needs to be repeated in the same conversation. For example, when a chatbot asks users a question, if the users don't anwer the question, the chatbot may need to repeat the question. In such cases, paraphrases could help make the repetitions sound more pleasant and natural.
Use the + button on the right of the text bubble to add paraphrases
of the message (see the screenshot below). The paraphrases will be
selected by your chatbot randomly to send during a chat. See best
practices for good uses
of paraphrases.
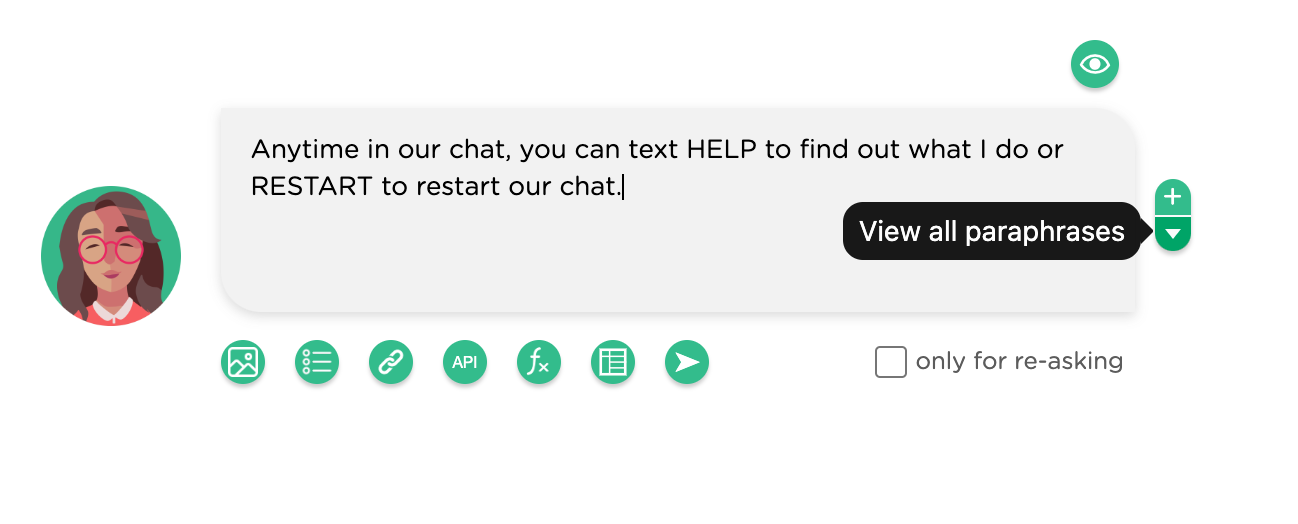
You can also view all the paraphrases using the "down arrow" button:
Chatbot Responses
You can also customize chatbot behavior based on user responses. The green "Customization" button shown below can be used to add a group of chatbot actions under one condition (trigger). Refer to the design best practices for defining specific conditions and corresponding custom chatbot actions.

In a natural conversation, different user behavior should drive different chatbot actions. Juji supports the customization of chatbot behavior in many ways. This section will use a set of concrete examples to show how to easily customize a chatbot behavior based on application needs.
Use Juji Built-in Dialog
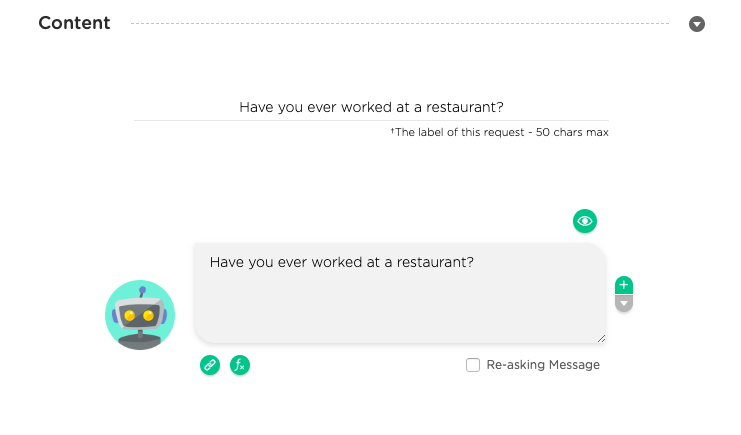
Unlike other chatbot platforms, Juji has a dialog library that contains thousands of built-in mini conversations. When you add a topic that is a free-text request, Juji automatically uses the request label to search its dialog library and retrieve a matched mini conversation for this request.
For example, if you enter Have you ever worked at a restaurant? as
the request label, Juji will auto retrieve the matched mini
conversation `This is to ask a user yes/no question' (see below)
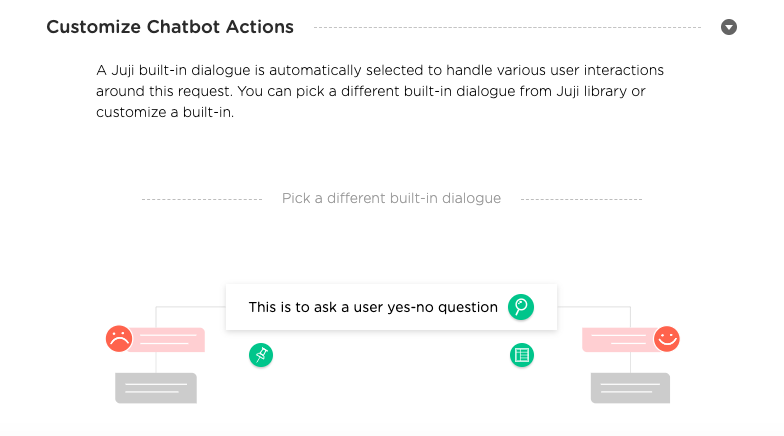
In this case, the built-in dialog will automatically process a user's positive or negative responses and enable you use the auto-detected expressions to direct the user to different paths. In other words, you don't need to worry about how to define triggers to catch highly diverse users' positive or negative expressions.
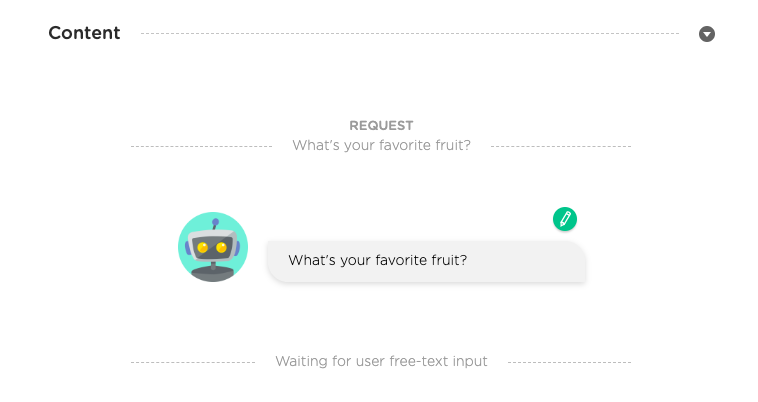
In contrast, if the request label is What's your favorite fruit, the
retrieved mini conversation would be Ask a user about his/her
favorite thing (see below)
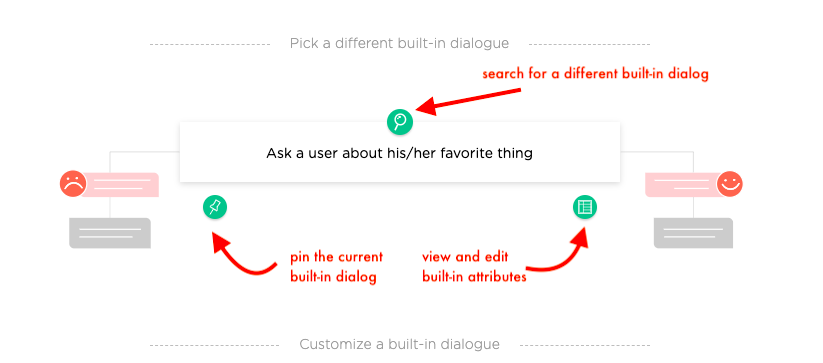
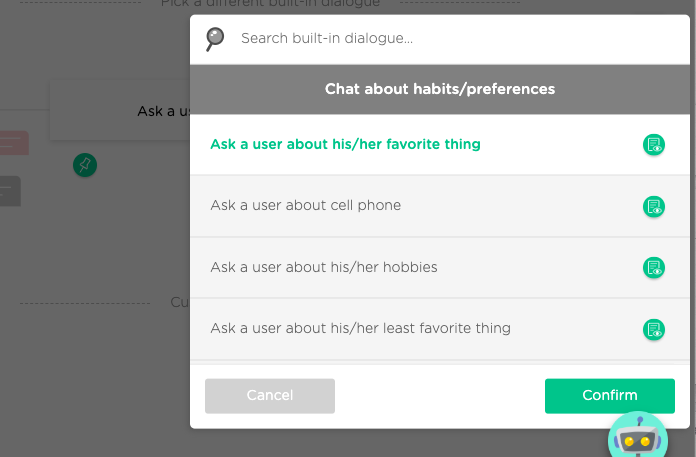
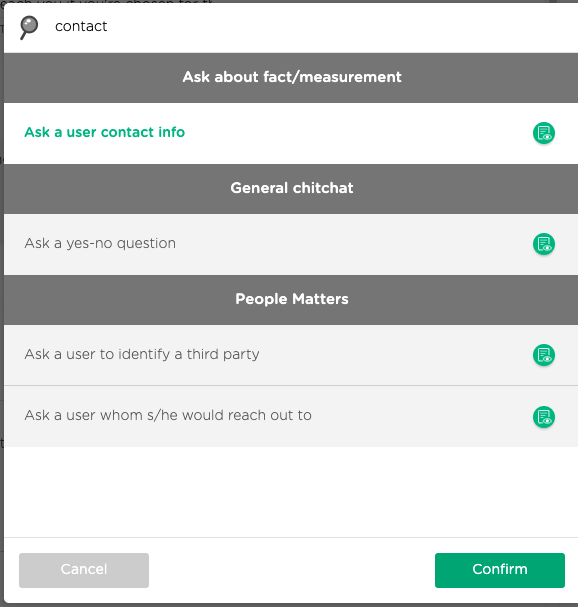
In case that Juji-retrieved mini conversation is not what you want to use, you can always find a different built-in dialog (click on the green search icon as shown above). Below is a screenshot showing the Juji dialog library, where you can browse and use keywords to search for a suitable, built-in dialog to use.
A built-in Juji dialog is very powerful as it helps handle diverse
user behavior automatically. For example, if you wish to collect
users' contact information, the built-in dialog Ask a user contact
info automatically handles various cases, such as user already opt-in
contact information or potentially erroneous input.
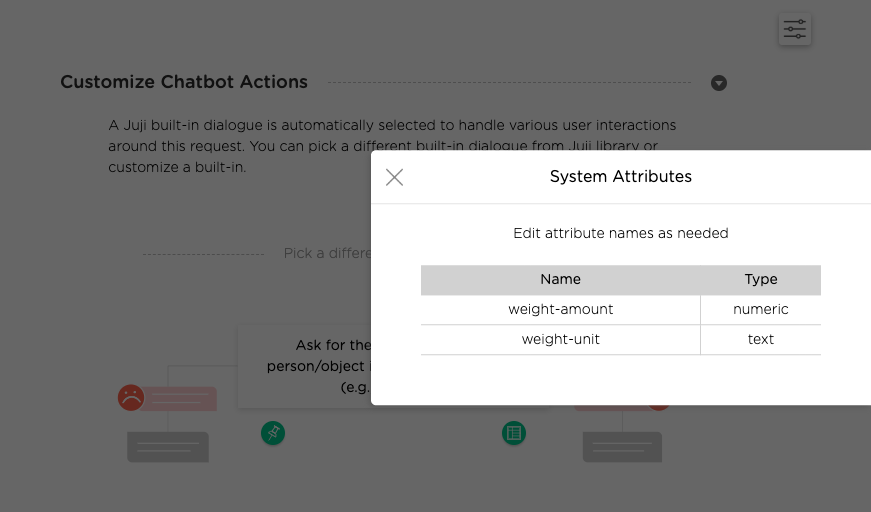
Use Juji Built-in Attributes
In certain built-in dialogs, Juji automatically creates a set of
built-in attributes to capture processed user input. For example, if a
mini dialog talks about the weight of something (e.g., How much
does your dog weigh), Juji automatically parses user input to the
question and stores the parsed user input into two attributes:
weight-amount and weight-unit.
Click on the green attribute icon to view the attributes associated
with a built-in dialog (see below).
You can also edit the attribute names to avoid potential conflicts. For
example, your chatbot asks two questions regarding weight, one for
dog and the other for cat. You would want to change the default
attribute names to dog-weight-amount and cat-weight-amount,
respectively to distinguish user answers to these two questions.
Pin a Matched Dialog
As described above, Juji uses the request label you entered to search
and find a matched built-in dialog. This means that changing your
request label will automatically trigger Juji to find a different
matched dialog. To avoid such situations, you can use the green pin
icon to pin a found dialog (see above). This means that changes in
your request label will no longer trigger Juji to search and
change the matched dialog automatically.
Besides reusing a Juji built-in dialog, you can always customize a built-in dialog. Next we use a set of examples to show how to customize built-in dialogs.
As shown below, each customization block includes two parts:
-
IF block defines the condition (also known as trigger) under which the custom chatbot actions will be performed.
-
THEN block contains one or more custom chatbot actions.
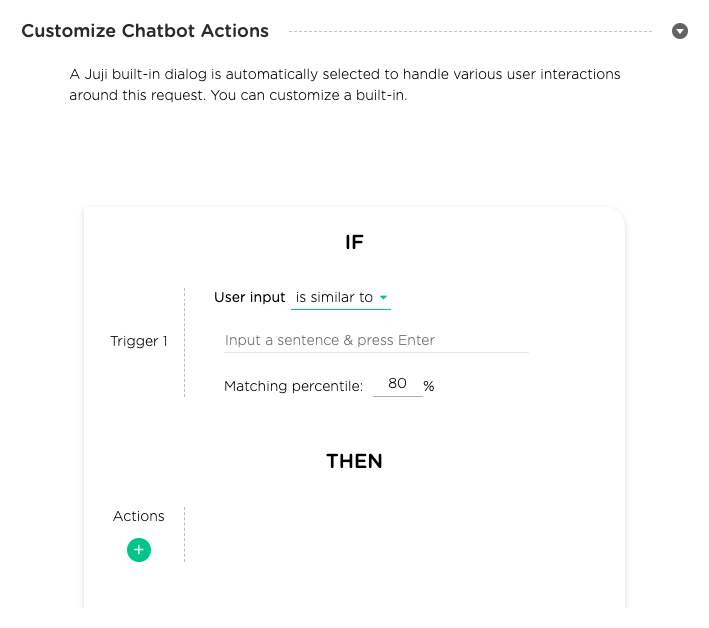
Customize IF Conditions
Since a free-text chatbot request may elicit unanticipated, diverse user behavior, currently Juji supports five types of IF conditions to capture user behavior:
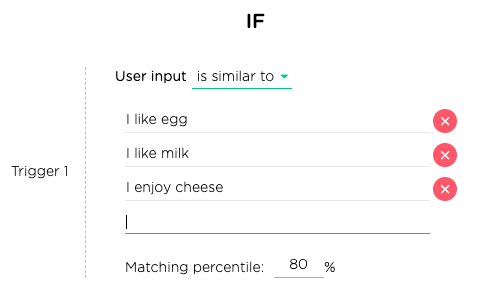
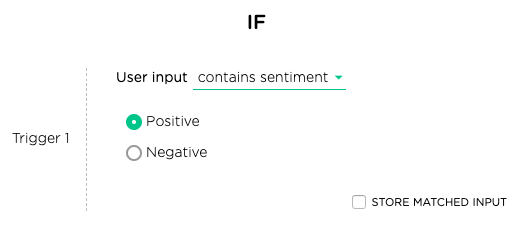
is-similar-toIf a user input is similar to one or more sentences or phrases. One can also specify the similarity threshold. By default, the threshold is set at 80%.
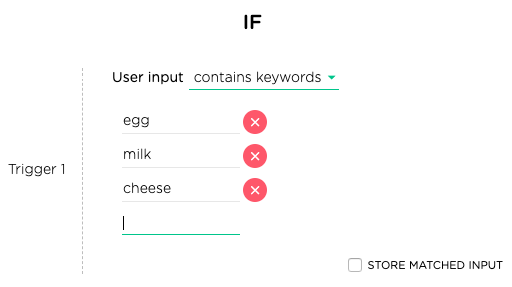
contains-keywordsIf a user input contains one or more keywords. Unlikeis-similar-tocondition, this condition requires a precise match with the stem of at least one specified keyword.
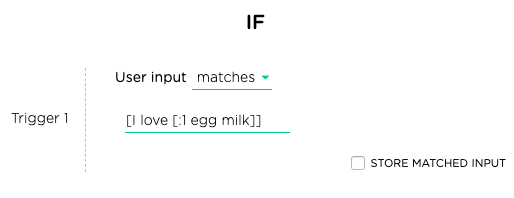
matchesIf a user input matches a rule specified in Juji chatbot language.
is-anything-elseIf a user input matches anything else. This is basically the default condition.

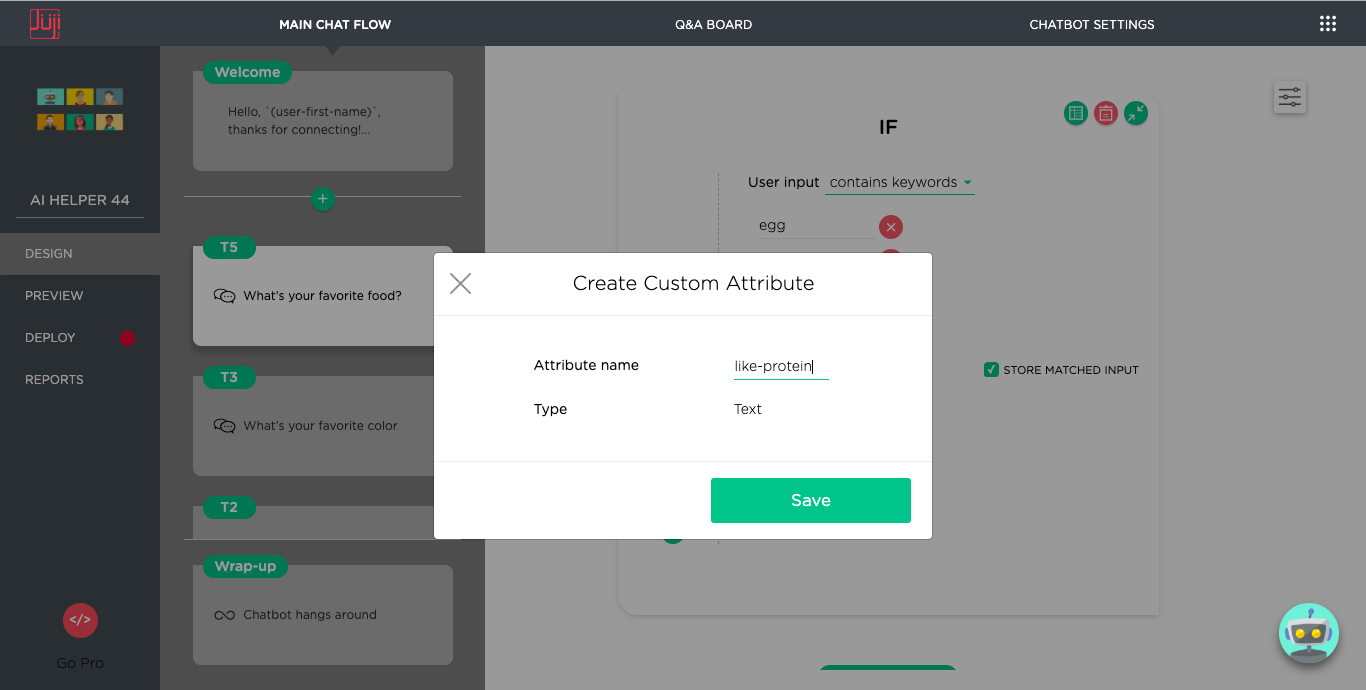
One can check on the box next to the STORE MATCHED INPUT to store the
matched input into a custom attribute.
As shown below, if a user input contains keywords, such as milk,
egg, or cheese, a custom attribute like-protein can be created
to store the matched keyword for each user.
Custom attributes can be used for many purposes, such
as customizing a chatbot message (see below) or indexing audience
information (e.g., showing all users who like-protein).
Note that for a choice request, since a user's input must be one of the choices, there is just one type of IF condition, the choice made by the user.
IMPORTANT TIP
To decide which type of trigger (chatbot condition) to use, please check out this design tip.
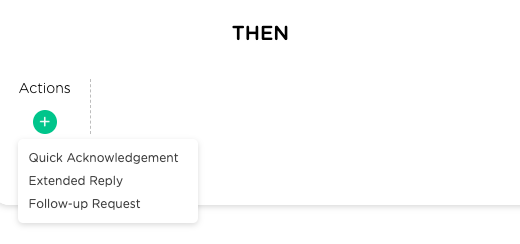
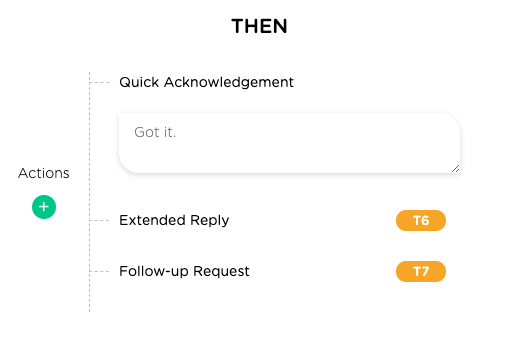
Customize THEN Actions
As shown below, when a IF condition is met, one or more custom
chatbot actions can be defined:
-
Quick AcknowledgementThis defines a simple text message that a chatbot can use to acknowledge a user. This simply sends a message without waiting for a user's response. This means that any follow-up question expression in this message won't be able to elicit any user response (unless it is a reflective question without requiring any user response). If you wish to ask a follow-up question, add aFollow-up Requestas described below. -
Extended ReplyThis defines a full chatbot message, including image and paraphrases, that a chatbot can use to make an extended reply. This defines a full topic - a message topic. -
Follow-up RequestThis defines a chatbot request that allows the chatbot to ask a follow-up question. This defines a full topic - a request topic.
Chatbot Actions
Besides customizing a chatbot's response to user input, you can also customize a chatbot's actions before or after the chatbot sends a message to users.
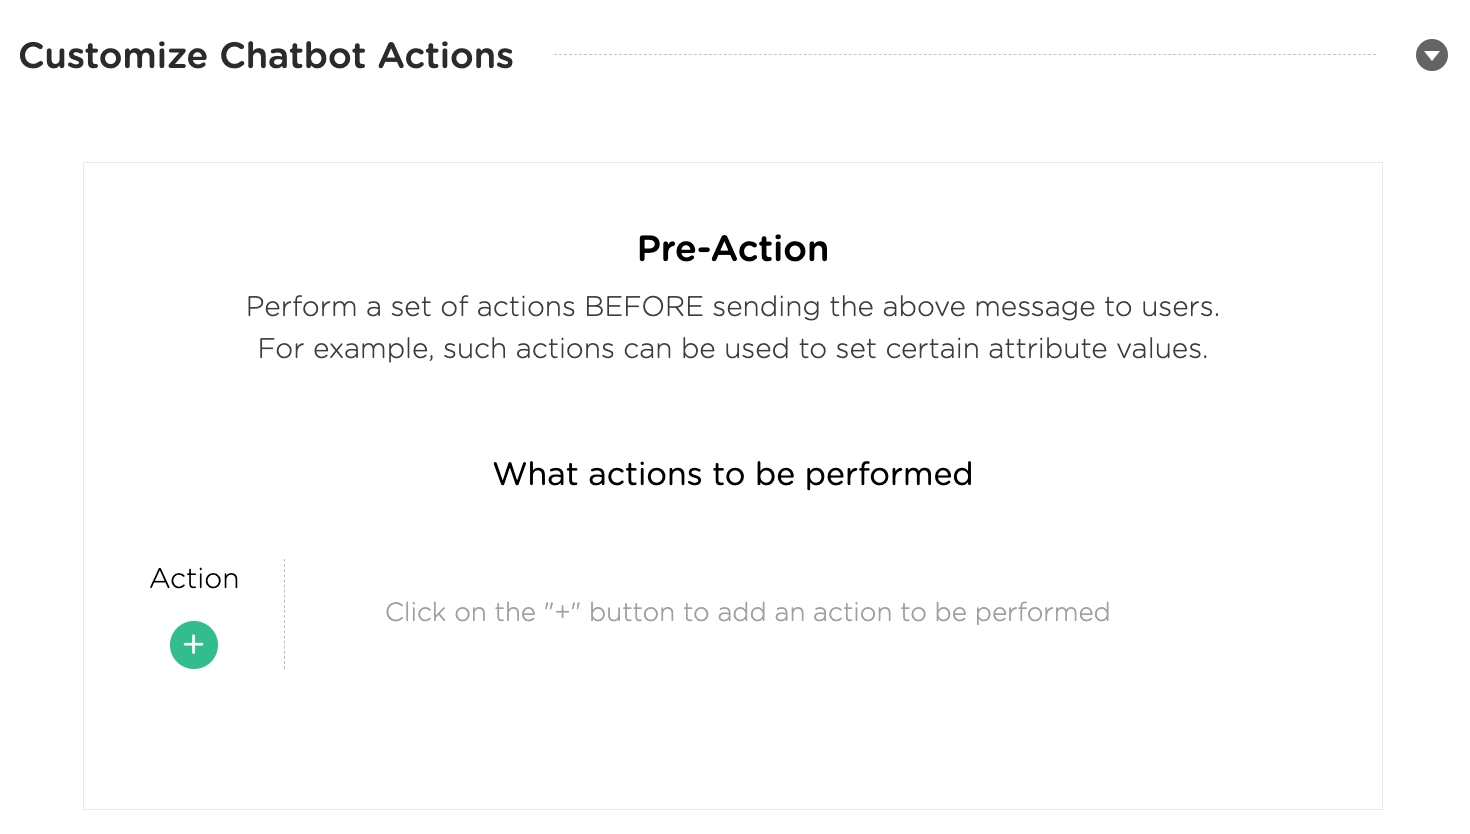
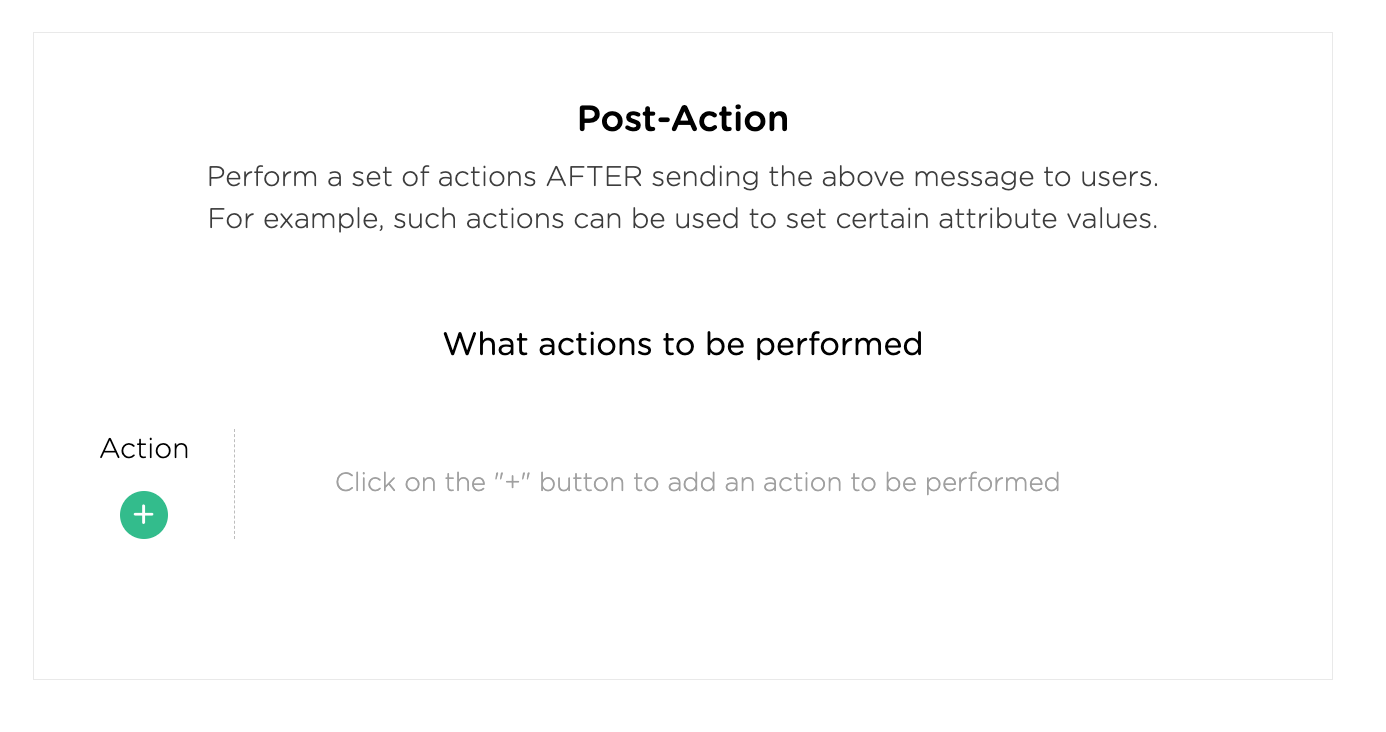
Use these actions to run background options. For example, a chatbot collects a user input (e.g., date of birth) and wants to check whether such an input is consistent with the user's previous input. To do so, one can customize a chatbot's action (post action) after collecting the user's date of birth. This post action will compare the current user input with the previous input. Sometimes certain actions may need to be performed before a chatbot sends a message to user. For example, if a chatbot wants to calculate a tax on a particular purchase, it may need to retrieve the tax rate per the user location. In this case, one could define a custom action (prior action) to retrieve the tax rate before sending a message to tell the user the total purchase price.
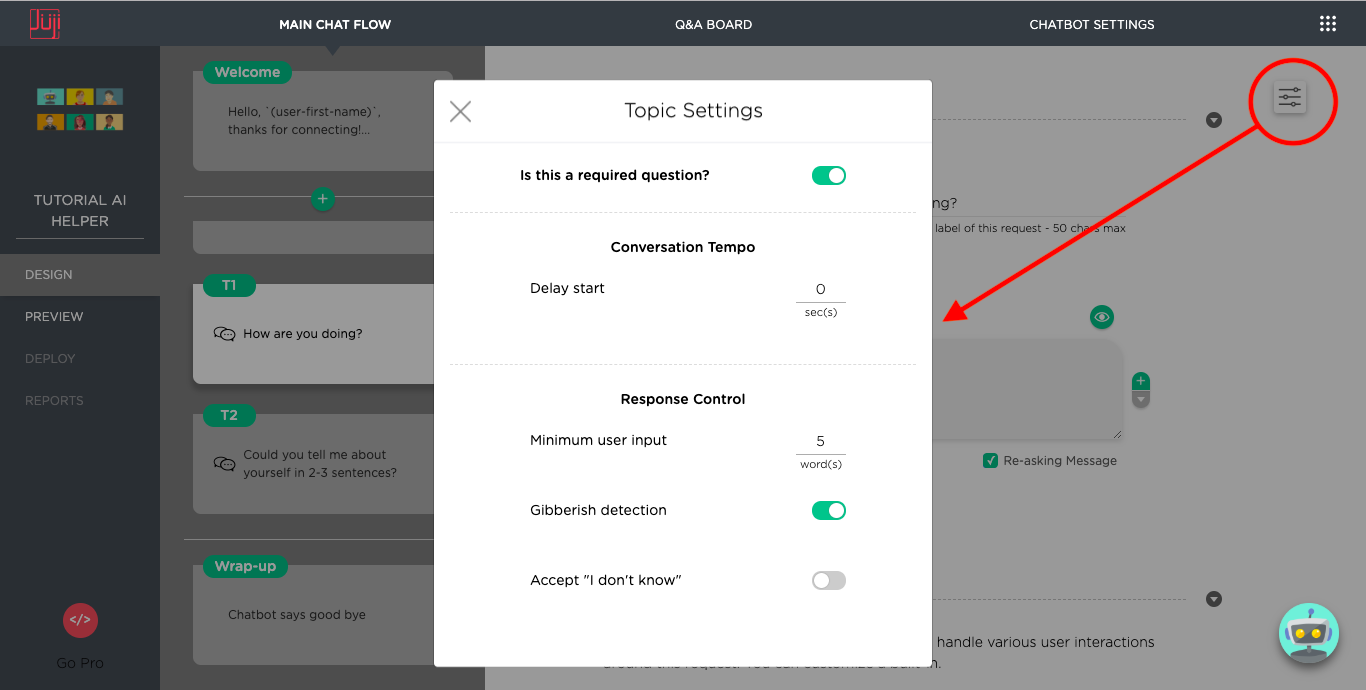
Topic Settings
You can also customize one or more topic-specific parameters, such as whether a "request" topic requires user response and the length of user responses. Please refer to best practices to fine tune these parameters.
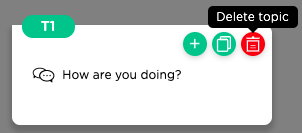
Delete a Topic
To delete a topic, mouse hover the corresponding topic card listed in the left topic panel. Then click on the red trash can icon to delete the topic. A deletion is permanent and cannot be undone.
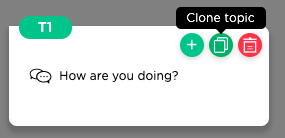
Clone a Topic
To clone a topic, mouse over the corresponding topic card listed in the left topic panel. Then click on the green clone icon to clone the topic. The cloned topic will retain all behavior of the original topic.
View Topic Relationship
Although the chat flow is presented a list of topics, but the inter-connected topics actually form a graph. When the complexity of the chat flow grows, the need to see the relationship among topics grows also. Juji Studio provides two convenient tools for users to visualize and examine the topic graph. The two icons on top of the topic list leads to a text and a graph view of the topic graph.
![]()
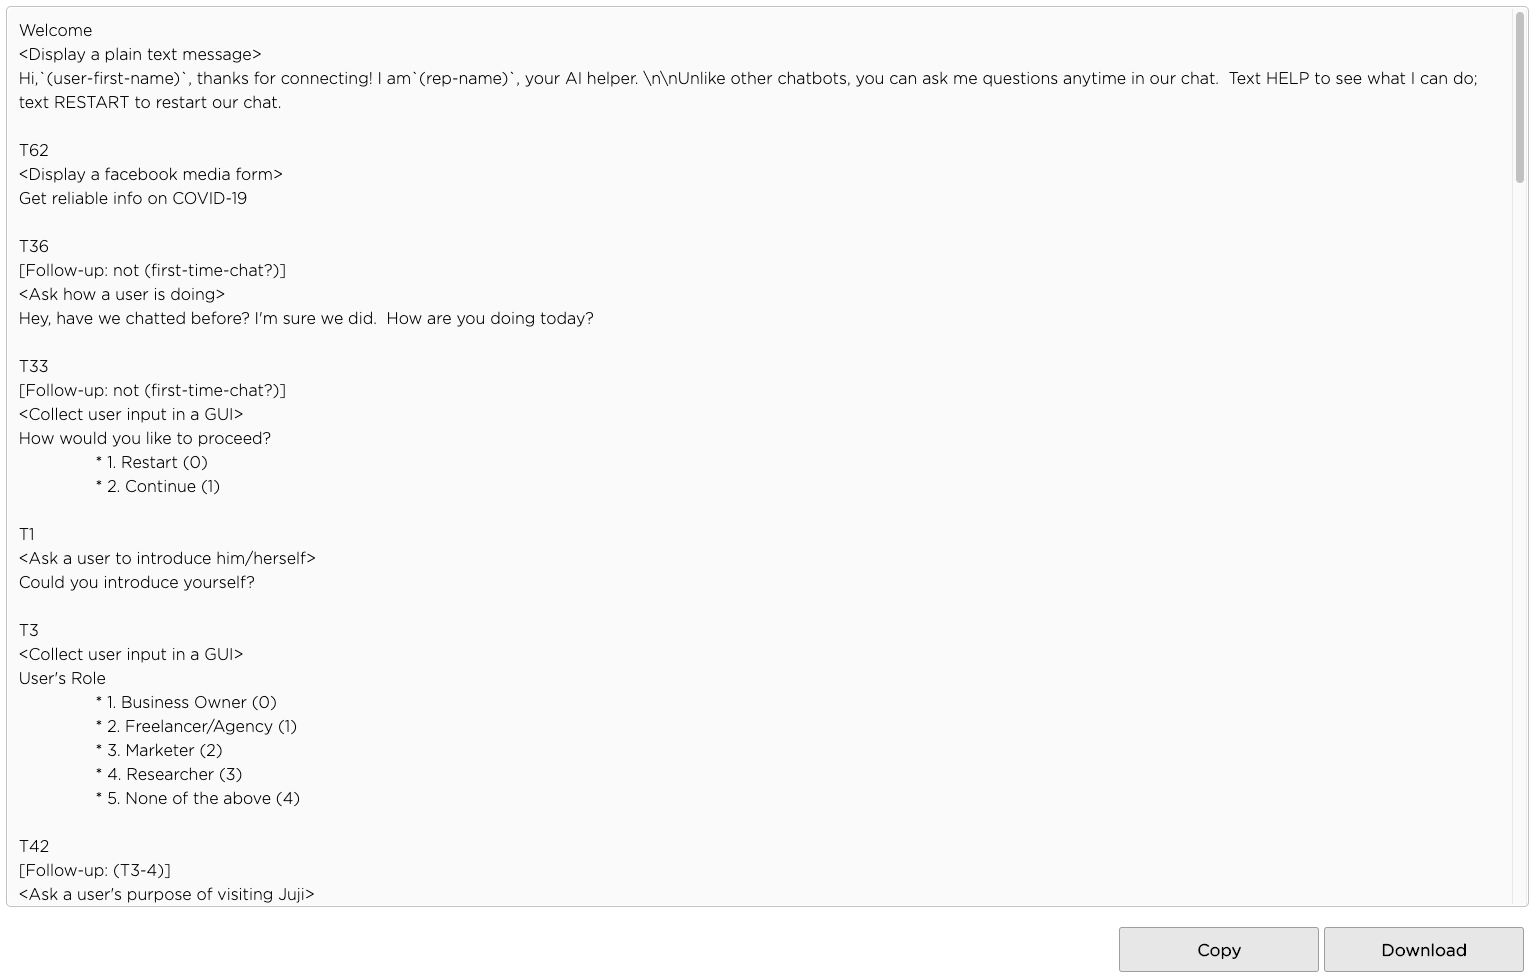
View Topic Text List
![]()
Click on the Topic Text List icon, you will see all the topics represented in a textual format in a new browser tab. You can copy or download these text for detailed analysis.
View Topic Graph
![]()
Click on the Topic Graph icon, you will see all the topics represented in a graph visualization in a new browser tab. Each node in the graph represents a topic. You can drag the nodes around, pan and zoom in/out the graph. Click Reset button to change the graph layout. Click Center button to re-center the viewpoint. Click Legend button to toggle on/off the legend of the graph. You can also change how long you want the node label to be by choosing a Label Size.
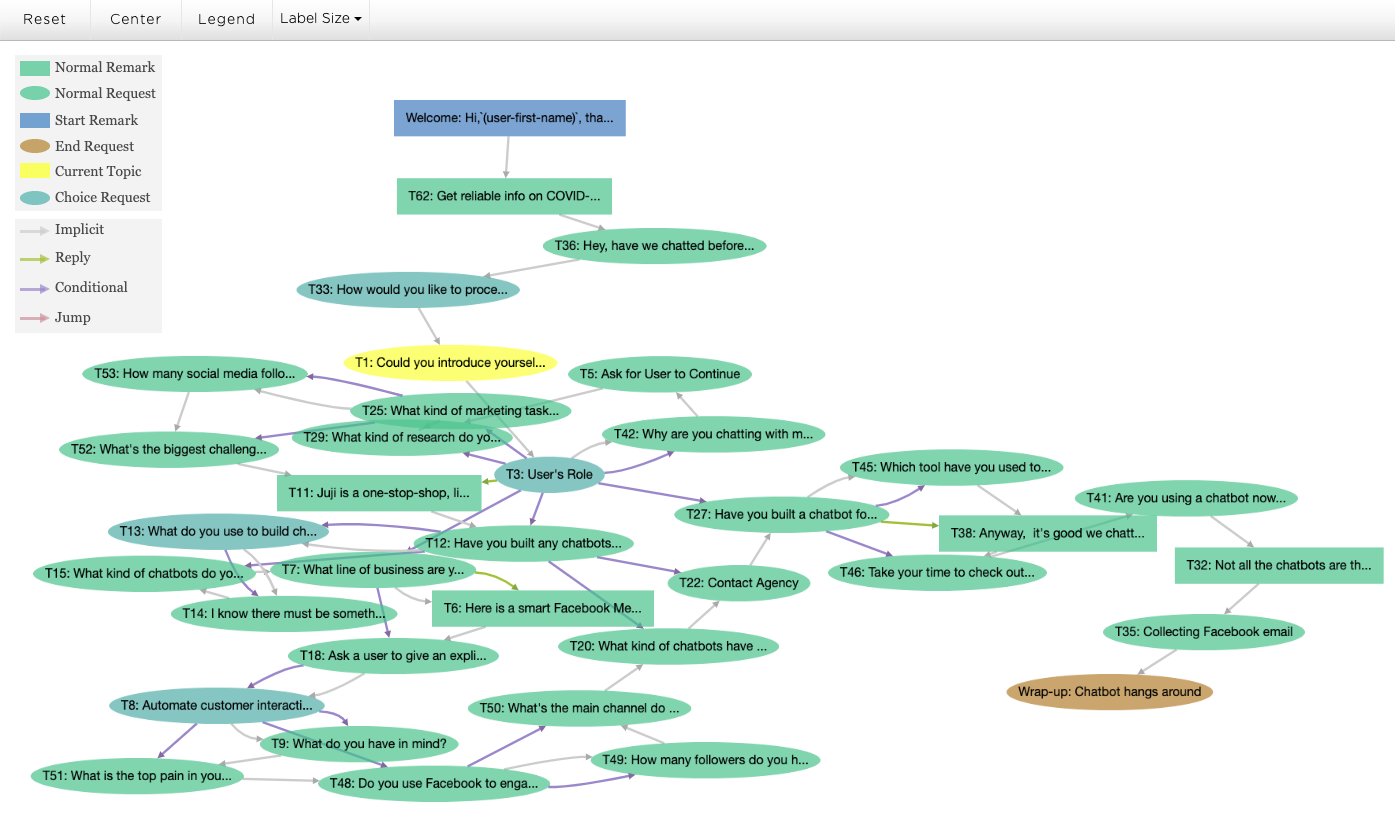
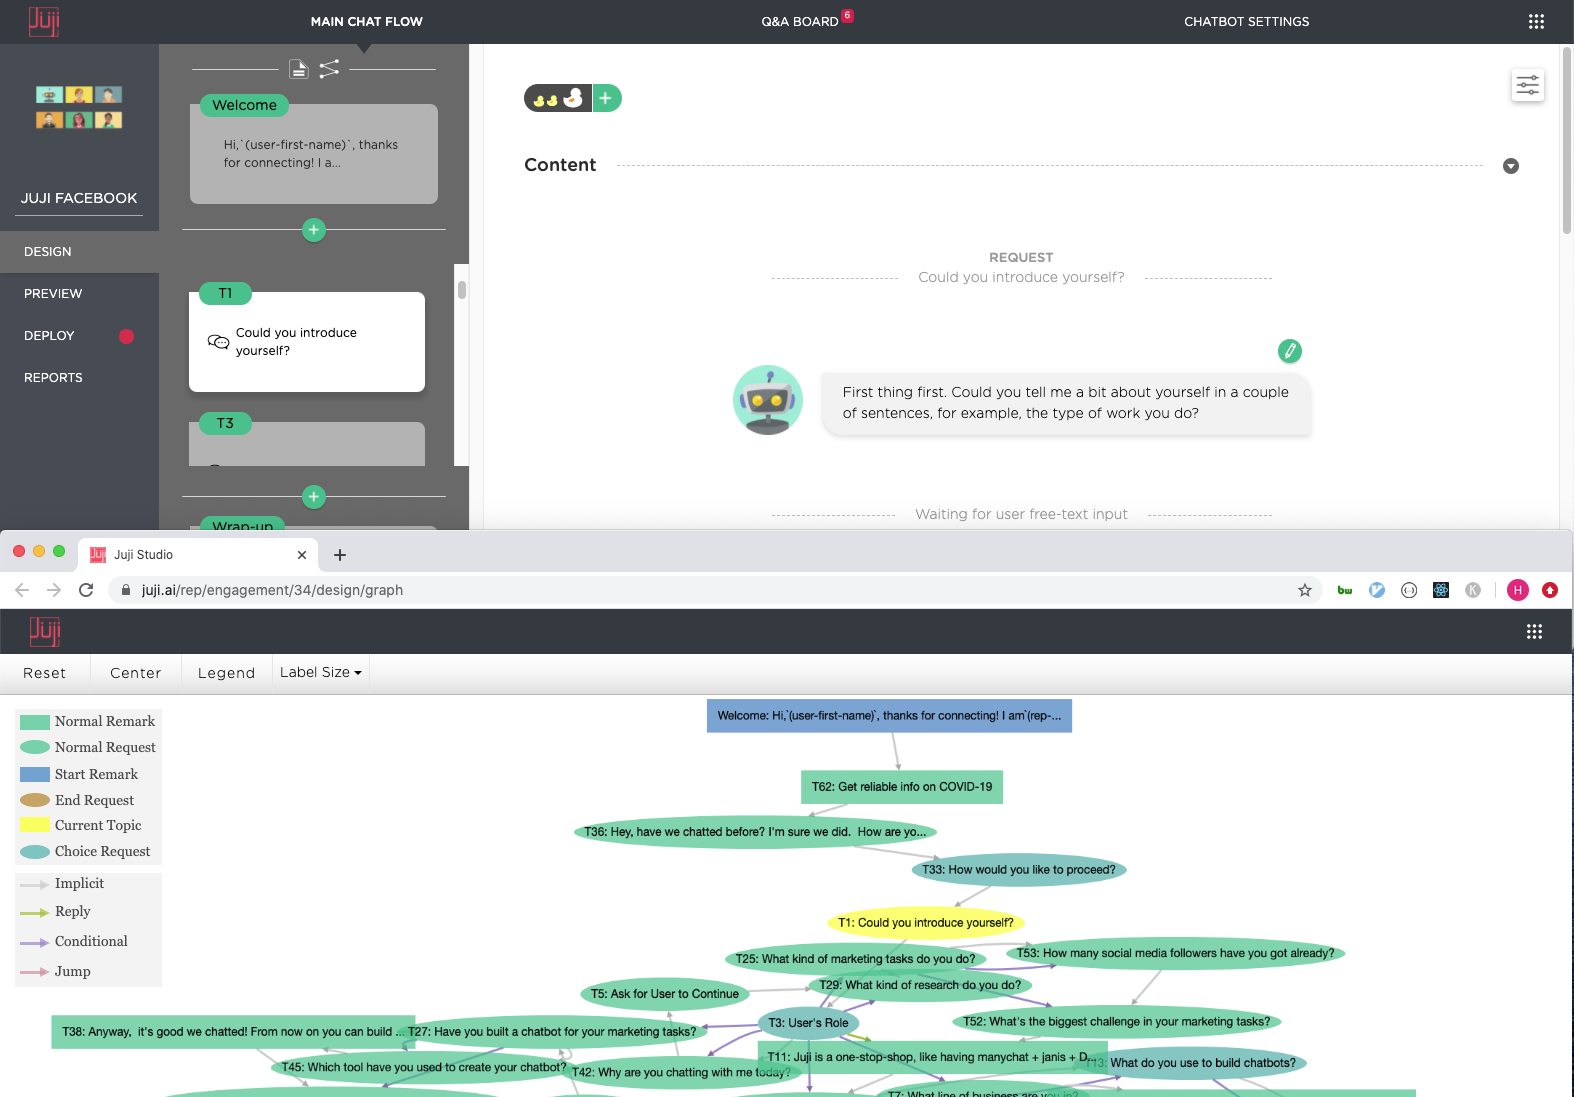
When you click on one of the graph nodes, not only the node turns yellow, the corresponding topic editor in the design view is also selected and open. So you can use the topic graph as a convenient topic navigator for editing topics.
Here is how to do it: first drag out the topic graph tab as a window, then lay this window side by side with the design view, or lay it top and down with the design view. The idea is to show both windows at the same time, so you can use the topic graph to navigate between topics for editing.
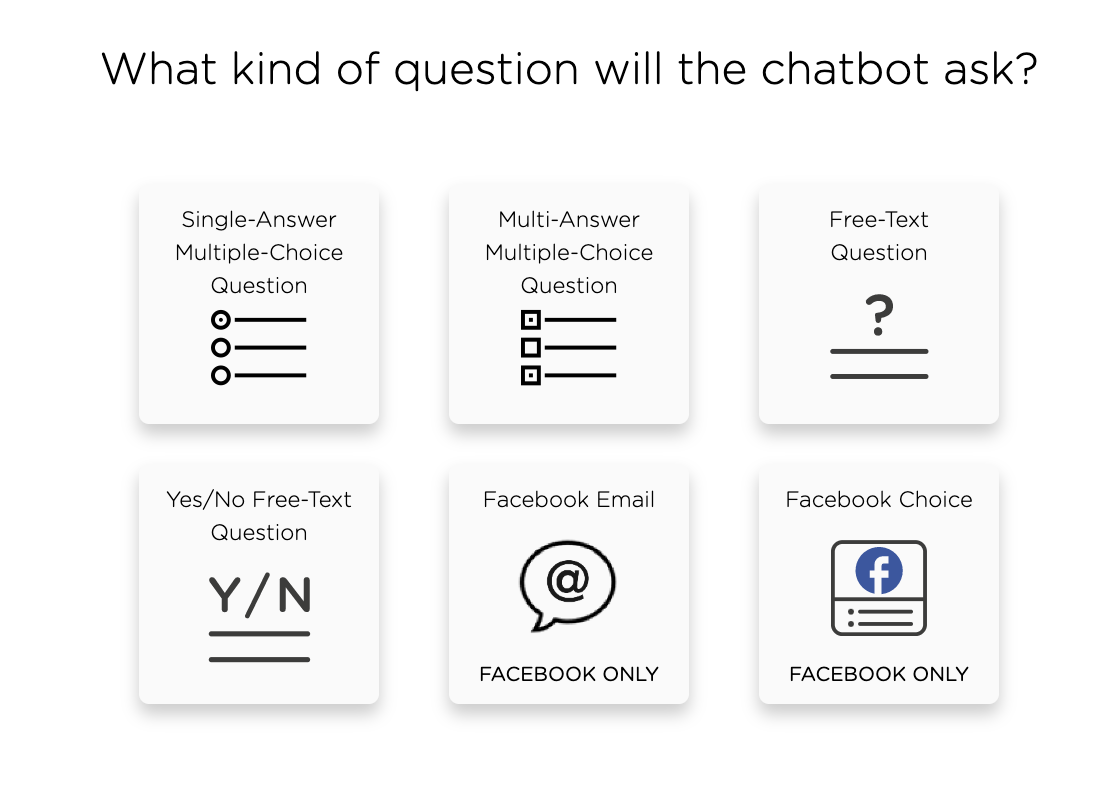
Type of Chatbot Request
Although one can write any type of conversation topics in Juji, below we list the types of chatbot requests currently supported in Juji Studio.
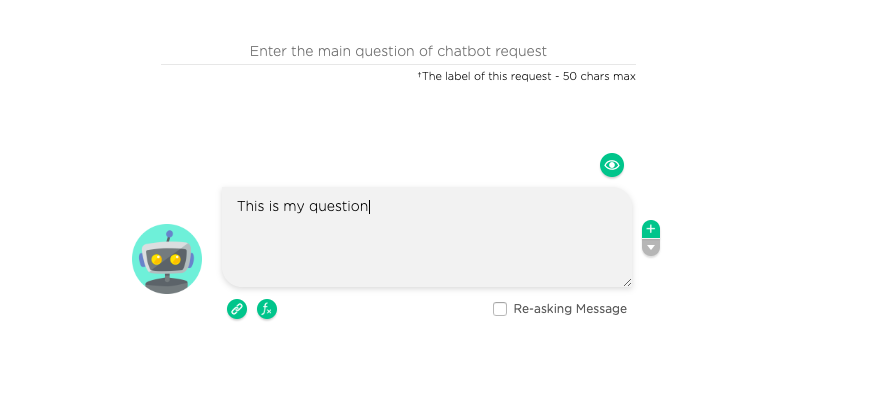
Free-text Request
Perhaps the most used request for an AI chatbot is to pose free-text, open-ended questions during a chat. Such a question can elicit diverse and detailed user responses to gather in-depth insights and better understand users' needs and wants.
As shown below, a free-text request includes the following:
-
Label Typically, a label is the short form ("stem") of a chatbot request. Although it automatically takes the form of the main message, it is good to give a sensible label as it is also used for multiple purposes (see best practices).
-
Main Message (required) This is the question that users will see in a chat. Instead of asking a question directly, a good message should also contain the context or motivation of the asking.
-
Re-asking Messages (optional) During a chat, a user may not always respond to a chatbot question. In such a case, a chatbot may want to repeat the question. One can add (green
+) paraphrases of a request and indicate whether such a paraphrase can be used to re-ask the question by checking theRe-asking Messagebox.
See best practices on how to phrase free-text questions in a conversation.
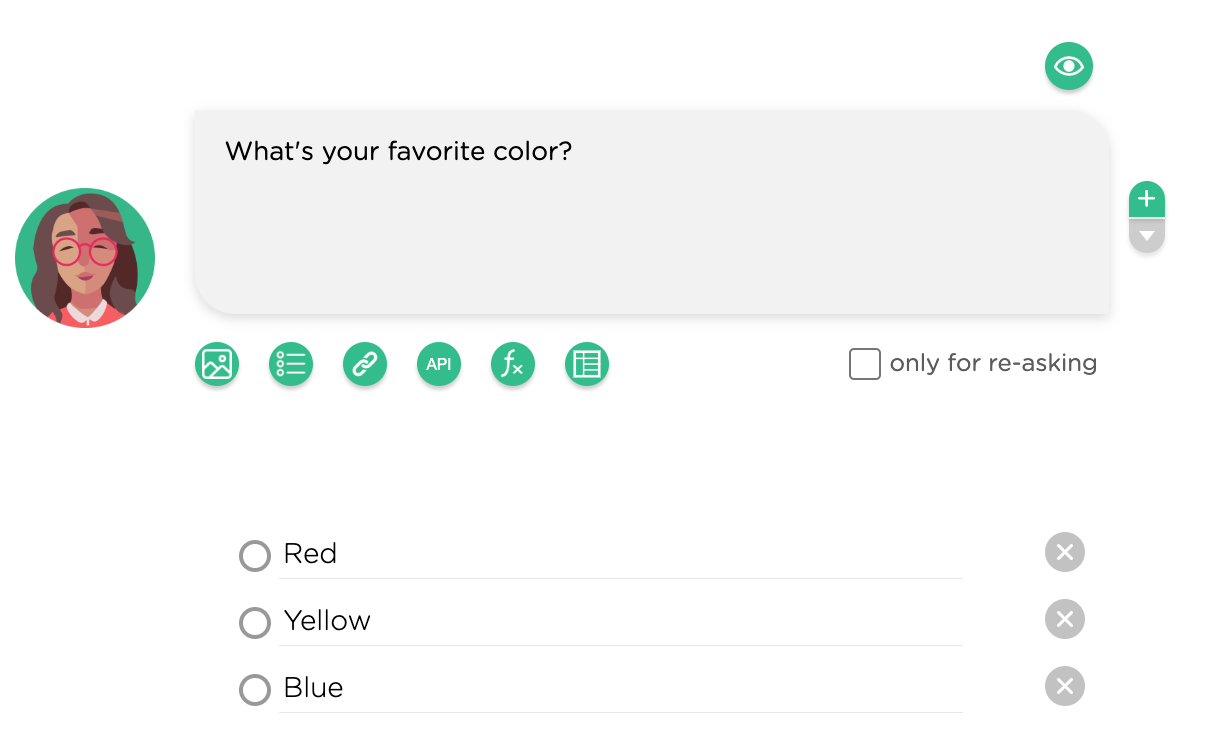
Choice Request (Radio Buttons)
One of the popular chatbot request is to ask a user to make a choice. Below is an example of a single answer, multiple choice request, also known as radio button question, where a user can select only one choice.
As shown below, this type of choice question contains:
-
Main Message (required)
-
Option Items (at least one item is required to be selected by user)

In addition to adding regular option items, Other option can be added to
let a user specify additional text. One can also indicate whether to
treat all the option items as numbers. Numeric choices can be used to
define chatbot conditions involving numeric operations, such as >=
and <. See examples below on defining chatbot conditions. There are other options that can be set to control the display of choice items (e.g., displaying the items in a random order or horizontally).
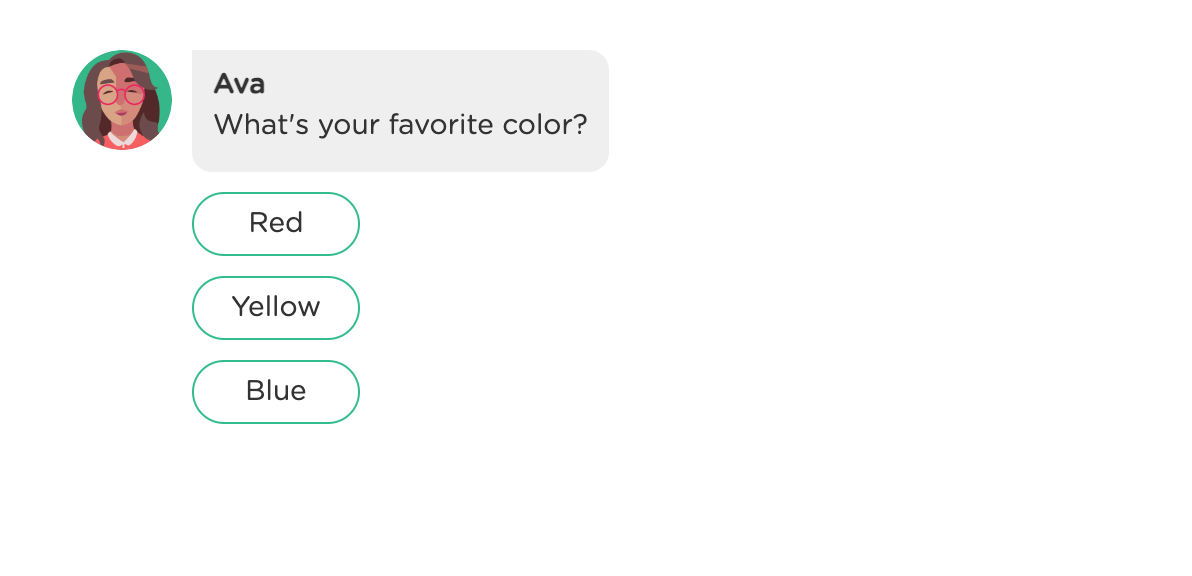
Depending on where the chatbot is deployed, the look of a choice question may be different.
A choice question displayed in a web-based chatbot:
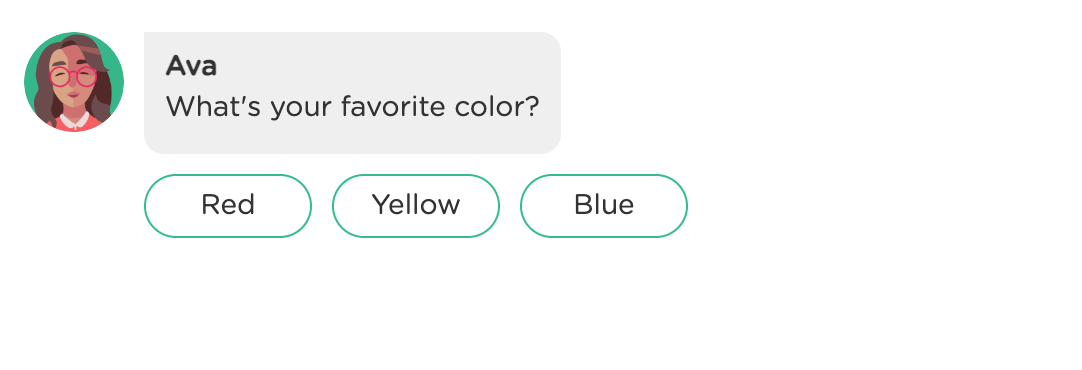
A choice question displayed in a web-based chatbot with items laid out horizontally:
A choice question displayed in a Facebook Messenger chatbot:
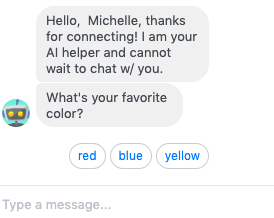
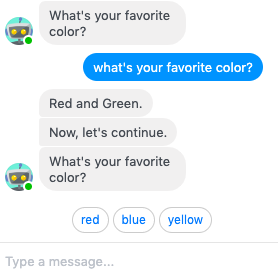
In Facebook Messenger, a user may enter a text message instead of clicking on a choice. In such a case, the chatbot will handle the user text input first. Since a Juji AI chatbot tracks a conversation context, it will repeat the question, if the choice question is a required one.
Below is an example chat where the user asks a question intead of making a color choice. The chatbot answers the user question and then repeats the choice question.
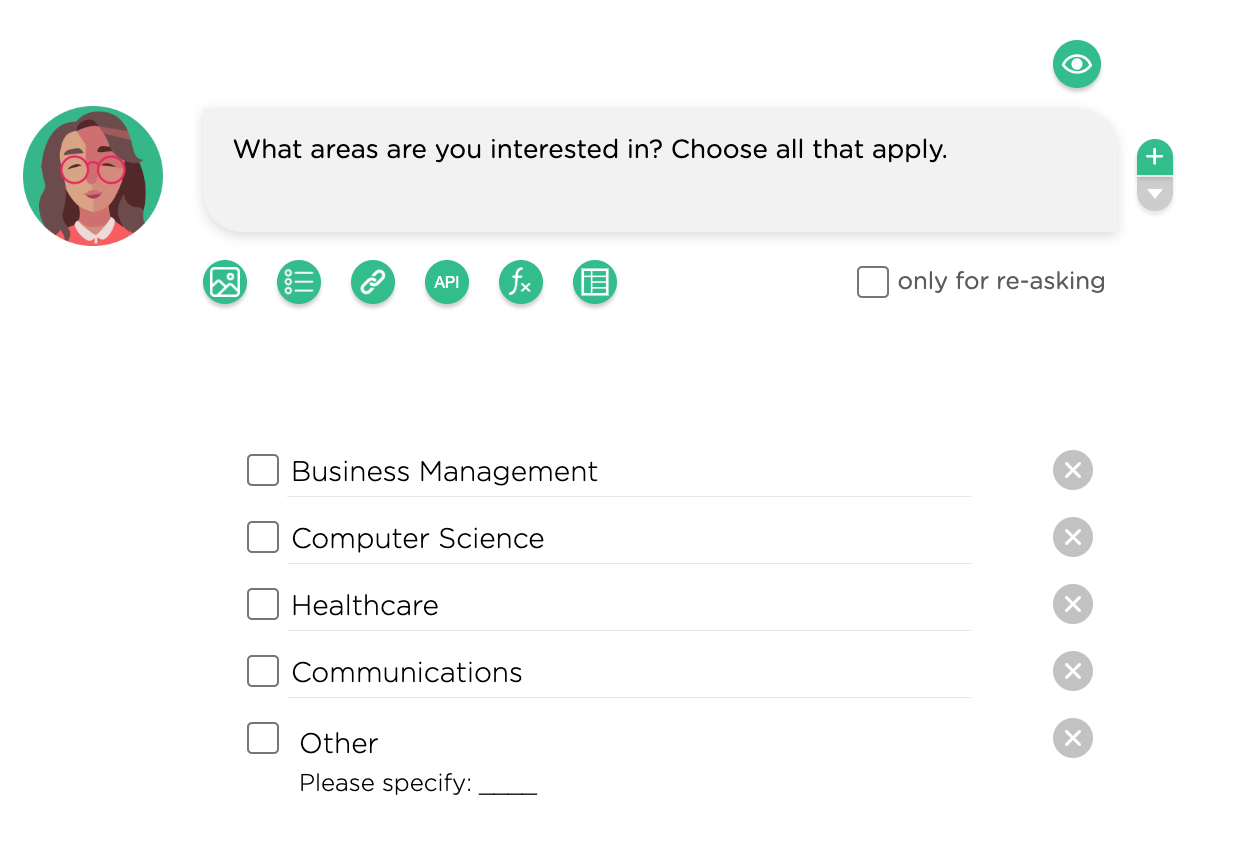
Choice Request (Checkbox)
Similar to the radio buttons shown above, another popular choice question is multi-answer, multiple-choice question, also known as checkbox question. This type of choice question allows users to check one or more boxes as the answer.
Below shows how to define a checkbox question.
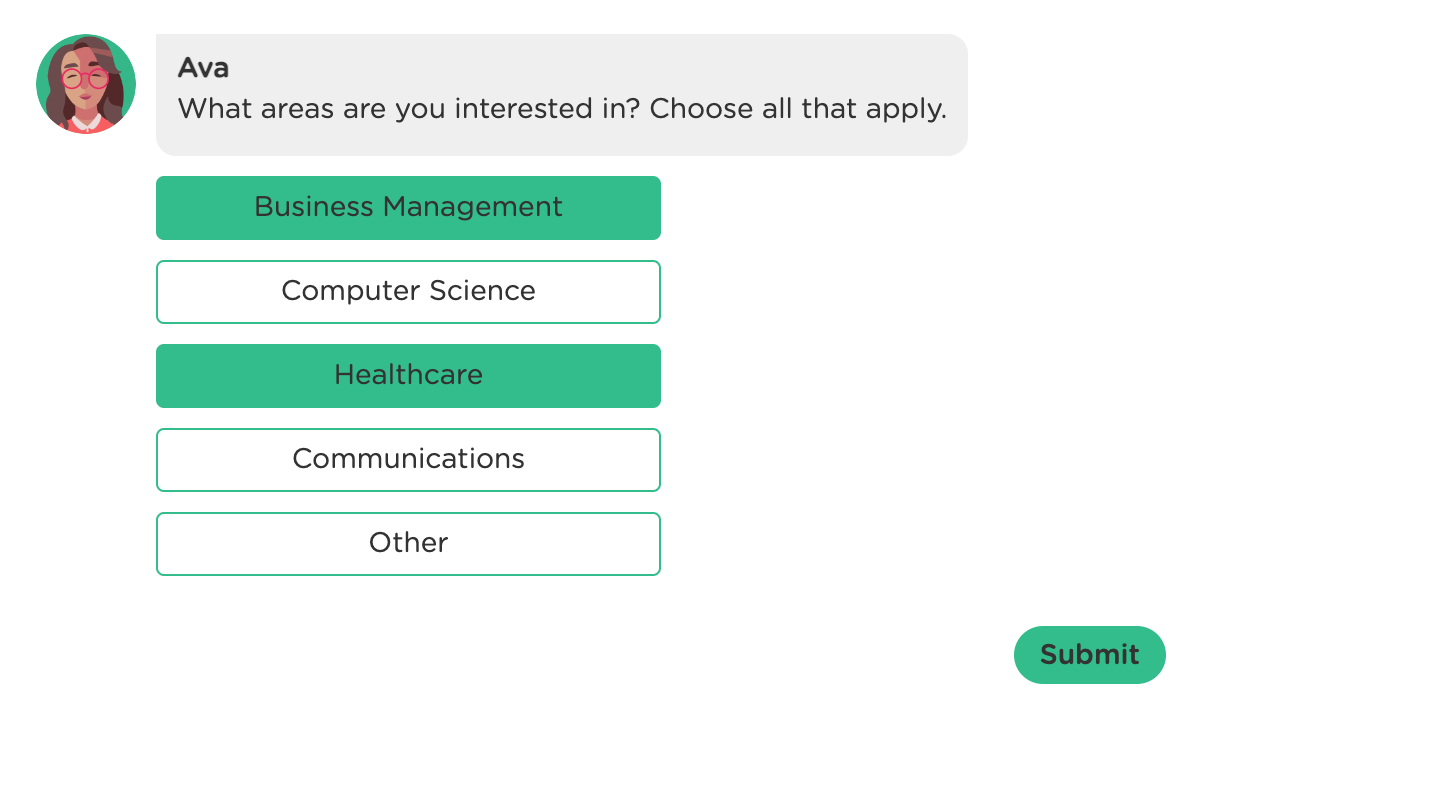
This is how a checkbox question looks like in a chat:
Facebook Choice
Semantically, a Facebook choice question is essentially the same as a regular choice question except that it takes the form of Facebook buttons in a Facebook Messenger chatbot. This type of request will not be displayed in a web-based chatbot.
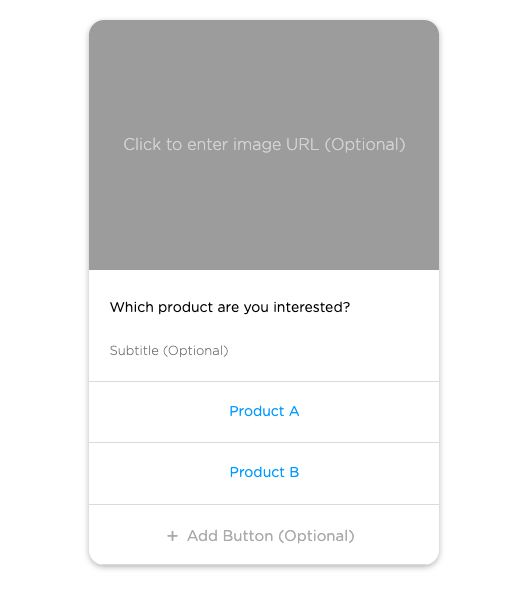
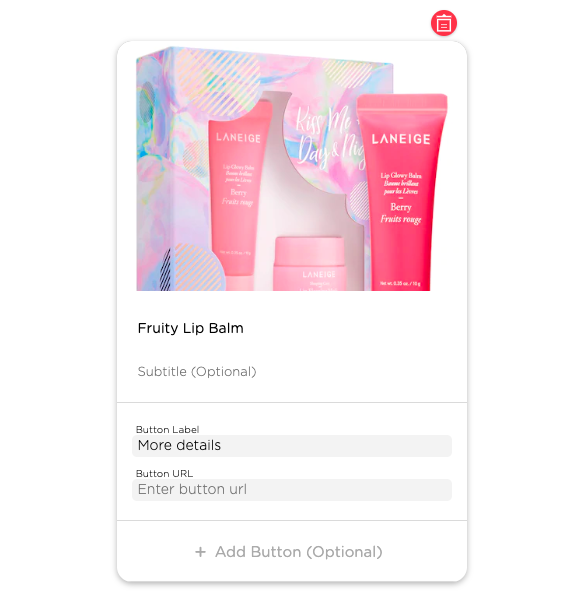
As shown below, a Facebook choice question includes:
- Title (required) This is the main asking message.
- Subtitle (optional) This adds more information to the question.
- Button (at least one button is required)
- Image (optional) An image URL can be added with the question.
Here is how a Facebook choice looks like in a Facebook Messenger chatbot:

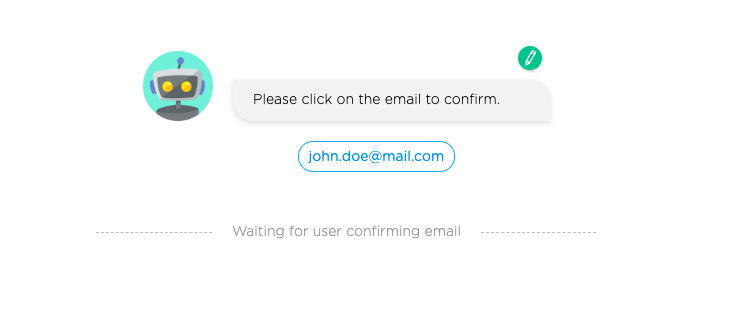
Facebook Email
This special request enables a chatbot to gather opt-in user email in
a Facebook Messenger chatbot. A user must click on the displayed email
to confirm (opt-in) his/her email. A user can also text an alternative
email. To allow users to skip this question, set this question not
required in the topic settings.
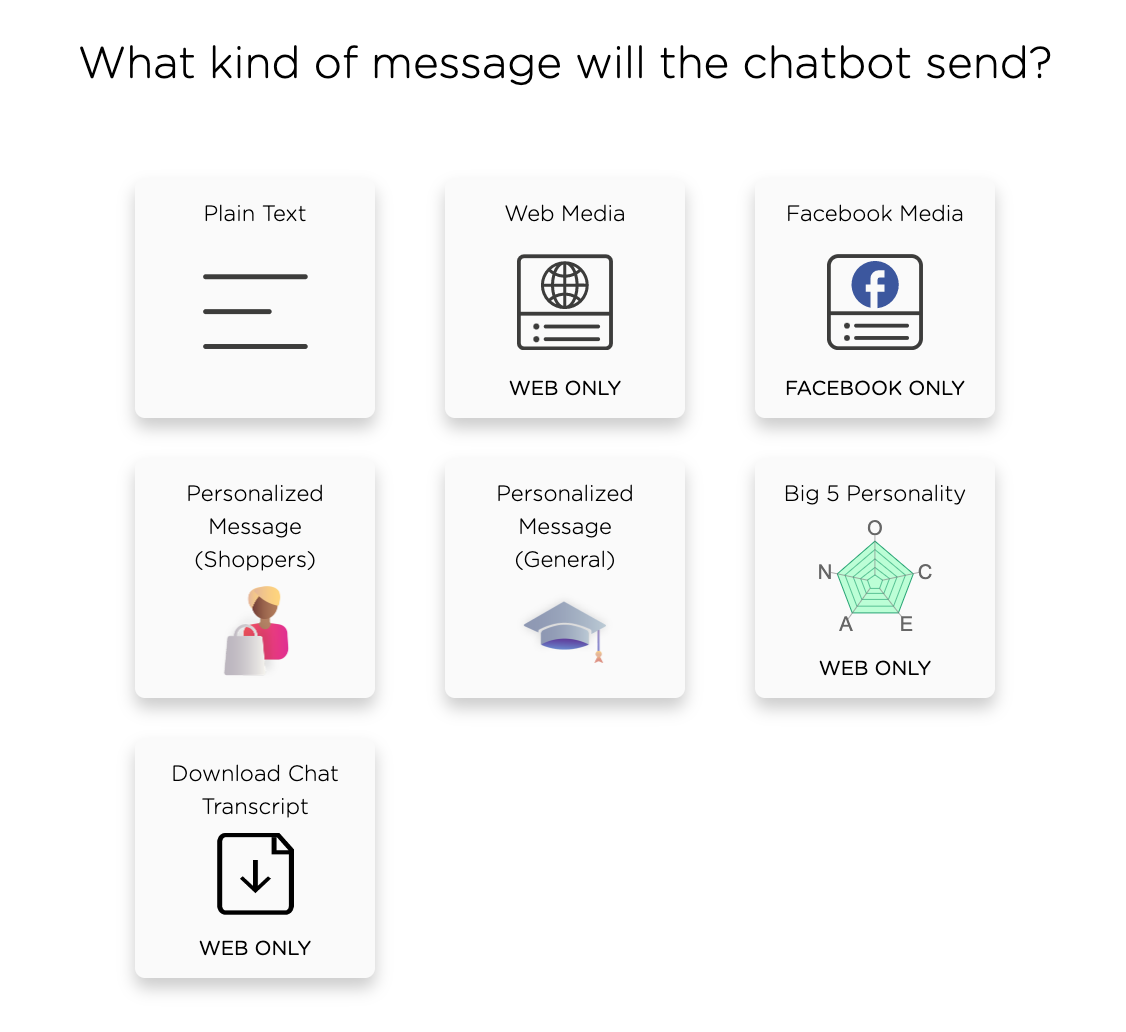
Type of Chatbot Message
Again, one can write almost any type of chatbot messages (e.g., multi-modal, information graphics, etc.), below we list the message types currently supported by Juji Studio.
Web Media Card
For a website chatbot, one can define a multimedia message with a combination of text, image or video, and URLs. As shown below, the web media card contains:
- Image or Video (required)
- Text Message (optional)
- Hyper Link (optional, up to 3 URL links)
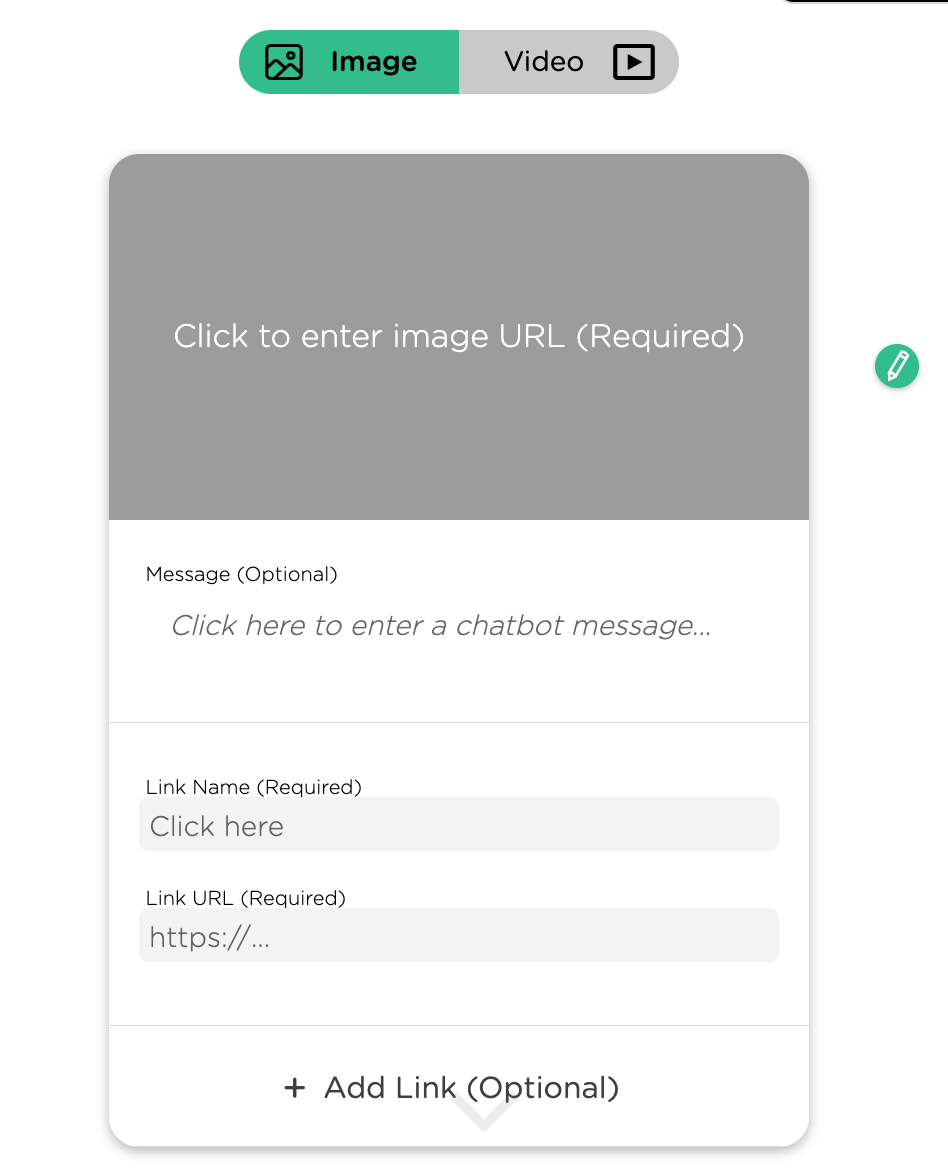
Below is the preview of a web media card with an image:
Web Media Carousel
Sometimes, one may wish to display several images or videos side by side like a carousel. This can be easily done in Juji Studio by simply clicking on the "+" button at the end of a web media card to add additional cards. One can add up to 5 media cards and they will be displayed as a carousel of images/videos in a chat.
An image carousel:

A video carousel:

FB Media Card
For a FB Messenger chatbot, one can define one or more FB Media cards to display a combination of text, image, and URL links. As shown below, each card contains:
-
Title (required field)
-
Subtitle (optional)
-
Image (optional image URL)
-
URL Buttons (up to 3 links per card)
Currently one can define up to three FB Media cards. In a Facebook Messenger window, these cards will show up in a carousel.

Note that FB Media cards will not show up if the chatbot is deployed on a website.
Special Topics
To help jump start the design of a chatbot, Juji has made two special topics: * Welcome Topic. This is the first topic in all Juji AI assistant templates. It cannot be removed. It sends the first chatbot message to users when a chat session starts. One can however customize the welcome message.
- Wrap-up Topic. This is the last topic in all Juji AI assistant templates. It cannot be removed. It sends the last chatbot message to users when a chat session ends. One can customize the wrap up message as well as the chat ending options.
Welcome Topic
No matter whether you use a blank template or a task-specific Juji template to create a chatbot, every chatbot comes with two pre-built topics, the Welcome topic that starts a conversation and the Wrap-up topic that ends a conversation.
To start a good or warm conversation, you may wish to edit the default messages in the Welcome topic to suit your context. Please refer to this recorded webinar to see how to phrase custom welcome messages for different use cases.
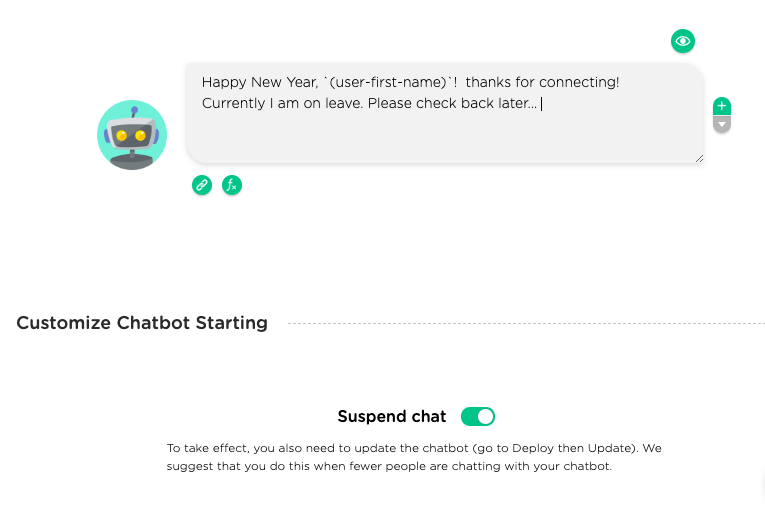
Suspend Current Chat
For various reasons, you may want to pause a chatbot before letting it interact with your audience again. You can do so easily in the Welcome topic:
-
Click on the
Welcomecard -
Click on the slider under the welcome message (on the right panel) to suspend a chat. See the screenshot below.
-
Edit the welcome message accordingly to inform users about the suspension/pause.
IMPORTANT TIP If your chatbot is deployed via a web URL, you may also want to change the greeting message on the web cover page to inform future users about the pause/suspension.
Wrap-up Topic
Another Juji built-in topic for every chatbot is the Wrap-up topic. One may want to customize a chatbot's ending behavior. For example, a chatbot that conducts an interview or conversational survey may want to end the conversation once the interview or survey is done. In contrast, a customer support chatbot must hang around all the time to serve customers.
To customize the ending behavior, click on the Wrap-up
topic, the last topic in the left topic panel.
- Then click on the text bubble or the
pencilicon to edit the topic: -
Option 1: Make a chatbot stick around
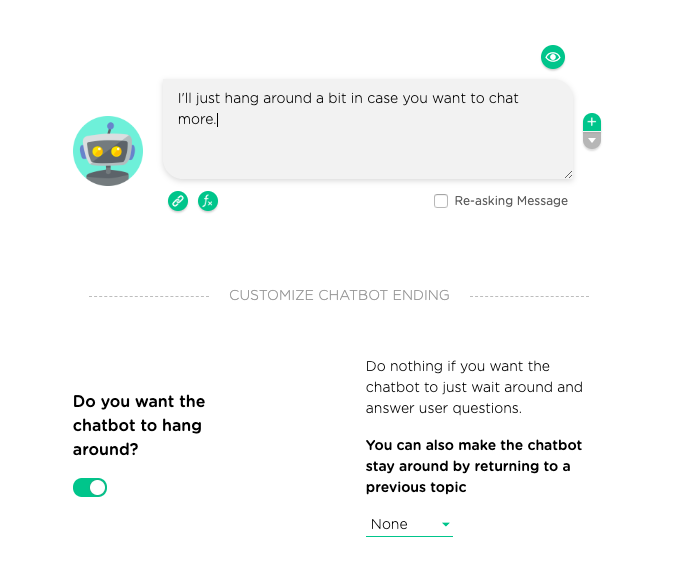
-
Option 2: End a chatbot
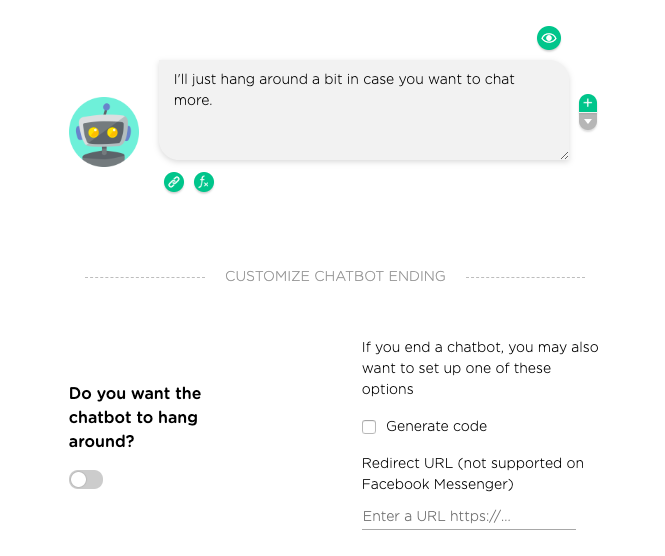
If you decide to end a conversation, you also have the option to redirect the ending to a custom URL of yours. Just enter the URL where you want the ending will be.
What's Next
Once a chatbot is ready, you can deploy it onto a website or a Facebook page. Please check out Chatbot Deployment to deploy your AI chatbot. If you wish to further customize your chatbot, such as its capabilities to handle user questions, please refer to Customize QA. If you wish to customize the chatbot's persona or other settings, please refer to Customize Chatbot Persona.